Art of the DBA Rotating Header Image

Creating Alerts for Azure SQL Database with Powershell

Last week, as I watched the Twitters, I saw an interesting blog post from Julie Koesmarno(@MsSQLGirl) about creating alerts for Azure SQL Database. These are cool because one of the many things I get asked about when talking about Azure SQL Database is “how do I monitor this darn thing?” With these alerts, you can monitor performance, capacity, and security settings, setting up either email notifications or webhook responses.

Now, me being me, I tweeted out that it would be cool to do this in PowerShell. I say this not just being a geek about the language, but also because if you want to live in the cloud you need to up your automation and scripting game. PowerShell is the way to manage your Azure resources, especially if you want to set up consistent alerts for all your Azure SQL Databases. Julie pointed me to some examples that, while not specific for Azure SQL Database, got me moving in the right direction. I’d like to share some of that learning here.

The cmdlets

To start, we need to know what cmdlets are at our disposal. You’re going to need the Azure and AzureRM modules first (I recommend using the Powershell gallery installation) and then we just need to use PowerShell’s command syntax to find what we’re looking for. Using Get-Command, just do a wildcard search around ‘Azure’ and ‘Alert’ as my search terms.

Get-Command *Azure*Alert*

2016-08-17_15-02-15

It’s not a long list, but we don’t need much to get our work done. It should be noted that these are generic and can be used across all Azure resources.

Because these cmdlets are generic, we have to identify the specific metrics we can monitor for Azure SQL Database. Fortunately, these are discoverable using the Get-AzureRmMetricDefinition, which is not listed but part of the AzureRM.Insights module (use Get-Command -Module AzureRM.Insights). To use it, we need to know our Azure resource ID, which we can derive from three pieces of information: the resource group, the server name, and the database name.

$ResourceGroup = 'IntroAzureSql'
$server = 'msf-sqldb'
$db = 'MSFADMIN'
$rid = (Get-AzureRmResource -ResourceGroupName $ResourceGroup -ResourceName "$server/$db").ResourceID
Get-AzureRmMetricDefinition -ResourceId $rid | Format-Table

2016-08-17_15-11-26

Most of these Name values match what Julie listed in her post, but the nice thing is if we ever get new ones, we can look them up with this method.

Creating an Alert

So let’s get down to brass tacks and actually create an alert. To do this, we need some info first:

  • The Resource Group we will create the alert in.
  • An Azure location where the alert will live.
  • An Azure SQL Database server and database we are creating the alert for.
  • What metric we will monitor and what is the threshold we will be checking.
  • (optional) An email to send an alert to.

With this, here’s the settings I’m going with:

Resource Group – IntroAzureSql
Location – West US
Server – msf-db
Database – MSFADMIN
Alert – dtu_consumption_percent greater than 90 (Flag if more than 90% DTU usage)

There are a couple other considerations for creating an alert. The first is a time window the alert will check against. This window can be anywhere from five minutes to a full day. The second is what aggregation of the metric we will check (i.e. total, average, maximum). You’ll want to use values and aggregations that make sense, but for the example alert, we’ll check the maximum value over a 5 minute window.

Once we have everything in place, we will call the New-AzureRmAlertRuleEmail cmdlet to create our email notification and Add-AzureRmMetricAlertRule cmdlet to create our alert:

$ResourceGroup = 'IntroAzureSql'
$location = 'West US'
$server = 'msf-sqldb'
$db = 'MSFADMIN'
$rid = (Get-AzureRmResource -ResourceGroupName $ResourceGroup -ResourceName "$server/$db").ResourceID
$email = New-AzureRmAlertRuleEmail -CustomEmails 'mfal@dummy.com' -SendToServiceOwners
Add-AzureRmMetricAlertRule -Name 'DTU90Check' `
-Location $location `
-ResourceGroup $ResourceGroup `
-TargetResourceId $rid `
-MetricName 'dtu_consumption_percent' `
-Operator GreaterThanOrEqual `
-Threshold 90 `
-WindowSize '00:05:00' `
-TimeAggregationOperator Maximum `
-Actions $email

2016-08-17_15-33-45

And now we can look at our shiny new alert using either the portal or Get-AzureRmAlertRule:

2016-08-17_15-37-18

2016-08-17_15-39-54

To get a rid of an alert is easy, too, just call Remove-AzureRmAlertRule:

Remove-AzureRmAlertRule -ResourceGroup $ResourceGroup -Name 'DTU90Check'

2016-08-17_15-42-50

Where To Now?

As you can see managing alerts in PowerShell isn’t all that difficult. The question is “why”? Hopefully you can already see the value, especially if you want to standardize your Azure SQL Database environment. By having all your alerts scripted out, you can apply them in a consistent fashion. This can be part of a larger automation process that helps scale out your environment as necessary. Regardless of how you manage it, using PowerShell can significantly decrease your management time for your Azure environment.

Thanks again to Julie for giving me the inspiration to figure this out!

Stuck in SQLPS

maxresdefaultA month and a half ago, with a lot of fanfare and maybe a little confetti, the SQL Server Tools Team released an update to SQL Server Management Studio that massively updated the SQL Server Powershell experience. As I blogged, this is a big deal and long overdue. I am extremely happy that this is finally getting some attention in Redmond.

However, once the dust settled and I had a chance to dig into things, I discovered that not all was rainbows and candy. The truth of the matter is that SQLPS is not so easily replaced. We are still going to be burdened with using the old module for at least the short term. This means at least being comfortable with the foibles of the old module.

Bundled With SSMS

The first real issue with the new SqlServer Powershell module is that is part of the SQL Server Management Studio install. I’ve long lamented the fact that you can’t install Powershell components separately. This means you’re limited to installing this only in locations where you can install SSMS 2016. Microsoft probably thinks you should be installing SSMS2016 EVERYWHERE, but even if you run on the bleeding edge this is a problem if you’re using Windows Server Core (no GUI, no SSMS).2016-08-11_14-41-38

I have not figured out any workaround to this. It’s possible to copy the module folder from a good install to somewhere else, but I’m nervous about that since something could be missed. This means that, until we can install this separately, users are stuck running SQLPS on servers without management studio. Yes, this means SQL 2016 without SSMS as well.

Not Recognized by SQL Agent

The second issue is that even if you do install SSMS 2016, SQL Agent won’t recognize and give you access to the new module if you use a PowerShell job step. When you create a PowerShell job step, the script in that job step runs within a specific context. It’s hidden from you, but whenever that script runs the first thing that happens is SQL Server launches sqlps.exe.

3285_72b386224056bf940cd5b01341f65e9dSqlps.exe is a “mini-shell”, which configures a few things to support SQL Server and PowerShell together. The important piece here is that the executable is hard coded to use the SQLPS module. Now, sqlps.exe is deprecated and going away, but only in a future SQL Server release. This means if you’re using anything previous to this release (having no idea when the release will happen), you are going to be forced to use the SQLPS module if you are creating a Powershell script job step.

How can you get around this? This is a trick that’s been around for a while. I try to avoid it since it adds additional layers to running PowerShell in an agent job, but it does work. What you do is create a CmdExec agent job and call the Powershell executable to run your task. This approach gives you a LOT more control on how PowerShell is working in your environment, but takes some extra work. Hat tip:Derik Hammer (@sqlhammer)

Stuck In The Past

pastLike I said before, I’m excited and happy the SQL Server Tools Team is improving the PowerShell experience for SQL Server. It has been a long time coming and I hope it continues. This is why it makes the above items SO frustrating, because while all these updates are being made, most of the user base won’t be able to use them. In a world where SQL Server installations still run on 2000 and 2005, it can take a long while to upgrade your core installation to take advantage of these improvements.

Normally, I’d be ok with this. I know that when I use an earlier version of SQL Server, I don’t get the shiny new toys. With SQLPS, though, it’s different. For all these years the experience has been klunky and problematic. While some of this klunky-ness finally got fixed back in March, most of us are still stuck with the workarounds because we do not have a way to install the updates.

What can you do about it? I’m glad you asked. Currently there are two Connect items that address these directly:

You can also make your voice heard on the community Trello board. As users, we’re at the mercy of Microsoft for updating this stuff and making it available to us. The goal is to raise awareness of these issues and let the development teams know how important they are. I will definitely give Microsoft credit for being more responsive to user feedback.


Out With The SQLPS, In With The SqlServer

This month, the SQL Server tools team released an updated version of the SQL Server PowerShell module. It is a huge leap forward for using PowerShell and SQL Server together, with the tools team making a serious commitment to correcting the sins of the past. While we still have a long way to go, this is a promising path. At this time next year, I’m certain the PowerShell/SQL Server experience will be in the best place it has ever been.

Before I share my thoughts, let me give you some relevant links. You know, in case you missed something.

Not Playing Nice

Now for my turn! First off, I want to call out that with the July 2016 update we have a new module. SqlServer replaces SQLPS, which means that all the old functionality in the old module exists in the new one (along with some nice little fixes). What I discovered is that this also means you can’t use both modules at the same time. I ran into this because my profile automatically loaded SQLPS for me. When I went to import SqlServer, I got some unpleasant red text:

2016-07-09_12-39-26

Basically, it’s a typing conflict with the SMO. Now, there’s no real reason why you should be running both modules side by side, but be aware that if you have anything that automatically loads SQLPS, you’re going to have problems. Fortunately there’s an easy way to fix this without having to restart your session:

Remove-Module SQLPS
Import-Module SqlServer

However, there’s another monkey wrench, especially for those of us using PowerShell scripts in SQL Agent jobs. Even with the release of SQL 2016 (which was just before these changes were made), SQL Agent still runs sqlps.exe and loads the SQLPS module. To check this, I made a simple agent job that executes:

Get-Module | Out-File C:\Temp\AgentPSModules.txt

The resulting output shows us the issue plain as day:

2016-07-09_12-50-13

There are ways around this, of course. The key here is awareness and I’m sure that we’ll see the SQL tools team get an update to this when possible.

Invoke-SqlCmd: Now with more flexibility!

Enough of the bad news, let’s talk about some of the improvements. As I mentioned earlier, Laerte Junior blogged about some of the updates to Invoke-SqlCmd. These changes really help make the cmdlet more useful for managing and working with outputs. However, I want to look at one specific addition more closely: connection strings!

I’ve always found the biggest limitation of Invoke-SqlCmd was that I couldn’t specify connection string parameters. This was a significant issue when working with multi-subnet Availability Groups, because I couldn’t specify MultiSubnetFailover=True, a key connection string parameter. Now I can, along with a host of other options.

Using it is pretty simple. Just declare a connection string as you would with any other application and pass it to the -ConnectionString parameter:

$ConnectionString = 'Server=localhost;Database=tpcc;Trusted_Connection=true'
$sql = 'SELECT name,physical_name FROM sys.database_files'
Invoke-Sqlcmd -ConnectionString $ConnectionString -Query $sql

2016-07-09_13-05-37

This new parameter opens up a whole new range of possibilities. I love that Microsoft is providing multiple paths to work with their tools. This means that if you’re a .NET guy who is more comfortable with connection strings, you don’t have to constantly keep looking up all the different flags and parameters of Invoke-SqlCmd. Also, if you have a situation which can not be addressed by those standard flags, you can always use the standard .NET connection string parameters and get the job.

(And yeah, I’m excited about this because it was my Connect item. :D )

Providing for the Provider

The last thing I want to touch on are a couple updates to the SQL Server provider. Now, the provider definitely has a bad name out there, but it can be a very useful tool for exploring and gathering SQL Server objects you want to work with. Since it is based on the SMO, it makes SQL Server object manipulation easier by giving you more options to collect your objects.

An important facet of the provider is that it behaves like a file system. How many of us have deleted files from the command line? Have you also used a PowerShell one-liner to delete old files, like backups? If you have, you might be familiar with two parameters: -WhatIf and -Confirm. These two switch parameters are extremely helpful because they can keep you from cutting yourself with that sharp PowerShell knife.

With the July 2016 update, the SQL Server provider now supports the use of these two switches. While using them may not be a common situation, it’s good to know that they are there. After all, it could be handy if you wanted to clean up some items from the command line, like maybe a junk database. Now you can both check what you’re going to do before you do it, along with getting a confirmation question when you go for the actual delete:

2016-07-09_13-21-52

While this may not seem like a big deal, it’s another example of how the SQL tools team is trying to get the SQL Server PowerShell module up to the standards of other PowerShell implementations. For all of us who struggle daily with technical debt, I’m sure you can understand how significant this is.

Early Days

I know the SQL Server PowerShell module still has a bad reputation with a lot of folks out there. Honestly, it’s well deserved. The SQL Server Tools team is out to fix that and everything we’ve seen over the last 3-4 months shows that commitment. A lot of this has to do with the effort put forth by the SQL Server community and the ongoing Trello board where the community is working with the tools team to suggest and prioritize changes. Want to help? Join us by contributing changes and voting up the current suggestions. Microsoft wants to make this your product and this is how we can help.

Sharing My Summit 2016 Submission Results

Sharing your abstract results for 2016 has become a Thing(TM) that Brent Ozar(@BrentO) started this week. At first I wondered about the value, but as I read others posts it made sense to share because it helps pull the curtain back a little to how the process works for speakers. It also gives us insight into the kind of work the volunteers are doing. As such, I want to share some thoughts on what I’ve seen and how it can be improved.

First off, let’s get the fine print out of the way:

  • Thank you to Allen White(@sqlrunr) and the speaker selection team for managing this cat herd. It’s a tough job, but it shouldn’t be thankless. We appreciate your hard work.
  • Thanks to the volunteers who gave of their time to read and offer feedback on the abstracts. While I have some thoughts on the nature of the feedback, I recognize and appreciate the time it took to write those comments.

Let’s go over the general thoughts. I’ve been deeply intrigued by the speaker selection process over the past five years. With each year, the speakers who submit get better feedback and the process is improving with each iteration. Just like the software we work on, it still has “bugs”, but I think we all need to recognize the strides this process makes and how PASS is doing its best to balance all the factors to create an annual Summit with a variety of voices and a solid conference offering.

On this, my biggest complaint is the overall subjective nature of many of the comments. I’ll address mine specifically when I list my abstracts, but as I read others feedback, it seems like many of the reviewers let their bias color things a bit too much. It might be that we have different perceptions of session levels or that there’s a misconception about a tool, technology, or technique. My suggestion back to the abstract teams is that, as you’re reviewing, step back a moment and be careful that your reviews do not contain too much subjectivity.

(Yes, even THAT might be considered a subjective judgement. Take it for what it’s worth.)

Now, let’s look at my abstracts (All General Session submissions):

Powershell Jumpstart for SQL Server DBAs – Level 100

(Accepted)

Abstract:
Powershell can be intimidating. There are many challenges to using it, especially for those not familiar with its nuances. Once understood, the language can be used for effective and robust automation that brings together SQL Server with other Windows components, such as the file system or Active Directory.

In this session, we will cover the Powershell fundamentals, how you can use Powershell itself to learn about concepts and syntax, and techniques for using Powershell with SQL Server. We will focus on core language patterns that you can use immediately, take the mystery out of the code, and help you get started writing your own PowerShell scripts. Attendees will not only acquire an understanding of Powershell, but see practical examples of how it can be used with SQL Server, along with a set of resources they can use to learn more about the language.

Prereqs:
None

Goals:

  • Introduce attendees to Powershell, what it is and where it came from. Cover basic syntax of Powershell and how it is written.
  • Demonstrate specifics of how Powershell can be used to manage and automate tasks around SQL Server.
  • Provide attendees learning resources for Powershell.

Feedback:

  • abstract – detailed but not compelling
    topic – level too low
    subjective rating: not interesting
  • The outline seems to clearly describe the contents of the presentation.  The topic and goals should be compelling to attendees.  The target audience should be big enough to support this session.  There appears to be a reasonable amount of live demonstrations in relation to the topic being presented.
  • Attendants would be interested this session because it is a beginners session.

My Thoughts:
This is where I have an issue with the subjective nature of the feedback. Maybe I’m a little too sensitive about DBA’s perception of PowerShell (I have the debate of “Why bother?” more than I care to count), but the “not compelling” comment is off base. A basic PowerShell session may not be compelling to the reviewer, but we have a LOT of DBAs out there who want this kind of information. I know because I talk to them a lot. I also take issue with the “level too low”, because this session is specifically designed to make PowerShell easy to grasp for those who haven’t worked with it.

I guess I shouldn’t complain too much since this was the one selected. I’m proud of it and the content. It has been very well received at other venues, so this is a case where I think the reviewer was letting their own personal bias of the content color the abstract review a little too much.

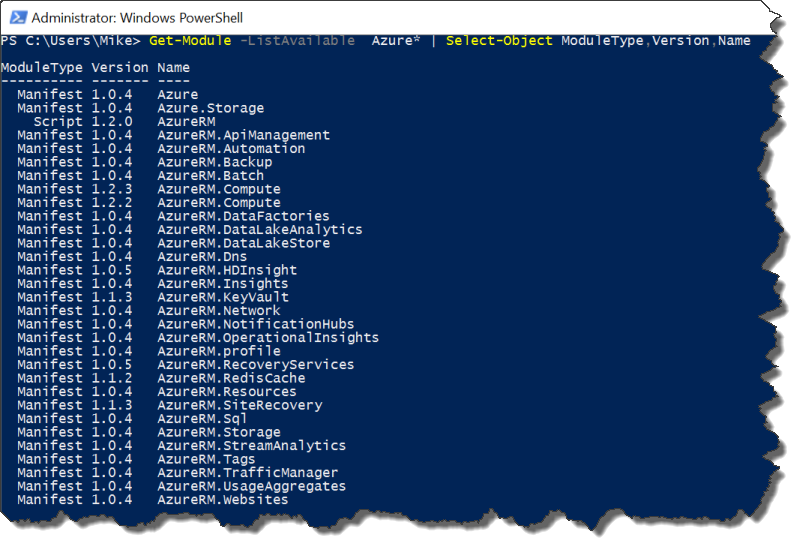
Automating Azure SQL Management with Powershell – Level 200

(Not Accepted Popular topic, higher rated session selected)

Abstract:
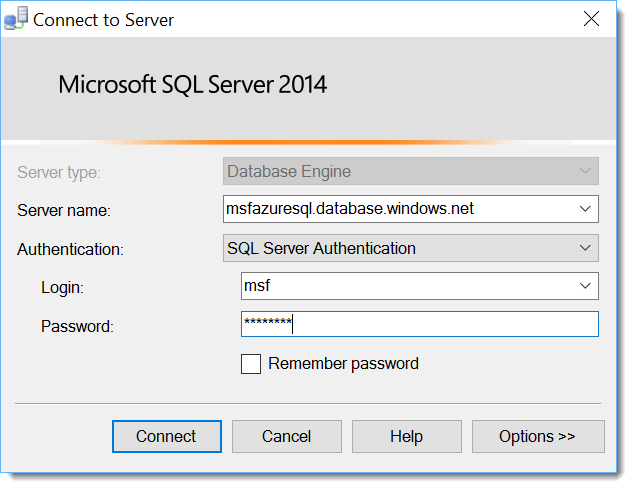
Azure is still a new frontier for many database administrators. While cloud environments bring a lot of flexibility and freedom, there is a lot to learn and a lot to keep on top of. The current portal provides a functional GUI experience, but the most effective way to manage Azure environments is by using Powershell. In this session, we will look at the fundamentals of using Powershell with Azure SQL databases. We will dive into the tools that can be used to deploy and manage these environments, as well as patterns and processes to automate these tasks. Attendees will leave with a solid foundation to build and administer SQL database environments in Azure.

Prereqs:
Basic familiarity with Powershell and Azure.

Goals:

  • Review Powershell Azure cmdlets and how to use them. Includes connecting to your Azure account and setting your subscription.
  • Examine the Azure cmdlets specifically built for Azure SQL Databases and how they apply to the Azure SQL Database operating model.
  • Demonstrate how to use the cmdlets to create, modify, and remove an Azure SQL Database. Discuss patterns for using these and automating Azure SQL Database deployments.

Feedback:

  • Abstract-  well written, compelling
    topic –  topic and title clear. Topic rarely covered
    subjective rating – interesting
  • Great topic. I would like to attend.

My thoughts:
I think this was just a full field and I had another session accepted. The feedback was pretty sparse, but there is an interest here. I’ll probably submit this one again.

Benchmarking SQL Server with Powershell – 300 Level

(Not Accepted Other sessions selected based on building a balanced program for track coverage, speaker coverage, topic coverage, and session rating.)

Abstract:
Performance is key for any database system. As professionals, we are constantly challenged to to keep our servers performing at peak condition. The struggle is many administrators do not understand their current profile, so it is hard to know when performance degrades. Benchmarking SQL Servers is a vital task that is often overlooked because it is either not understood or difficult to manage. This session will cover the important metrics to measure for an effective benchmark and will also demonstrate how a benchmark can be captured using Powershell. Attendees will leave with a clear plan of how they can measure their SQL Server performance, how that measurement can be automated, and how to develop an action plan to dynamically manage these tasks at scale.

Prereqs:
Understanding of SQL Server performance fundamentals, such as perfmon counters and wait statistics. Basic understanding of Powershell.

Goals:

  • Review what constitutes a good SQL Server benchmark. This will cover perfmon counters and wait statistics.
  • Demonstrate how this benchmark can be collected with Powershell.
  • Show how the benchmark can be automated and reported on.

Feedback:

  • abstract: one grammar error in abstract, but detailed;
    topic interesting
    subject rating: I like this topic
  • I would attend this session.
  • Topic is a good and relevant option.
    Level is good for prereqs and goals.
    Abstract is ok, with a few wording and grammar choices that could be improved/changed to make reading easier (ie. ‘performing at peak condition’ and  ‘The struggle is (that) many… ‘.

My thoughts:
Again, full field. This is a session of mine that has evolved over the past year. It started as more PowerShell focused and has become more “How to do a benchmark” focused with PowerShell the supporting actor. The grammar comments are something I continue to work on, because I tend to get waaaaaaay too verbose when I write and put myself into grammatical corners (see what I did there?). I would submit this again, because it appears to have been well received.

SQLPS In Depth – Level 200

(Not Accepted Higher rated session selected)

Abstract:
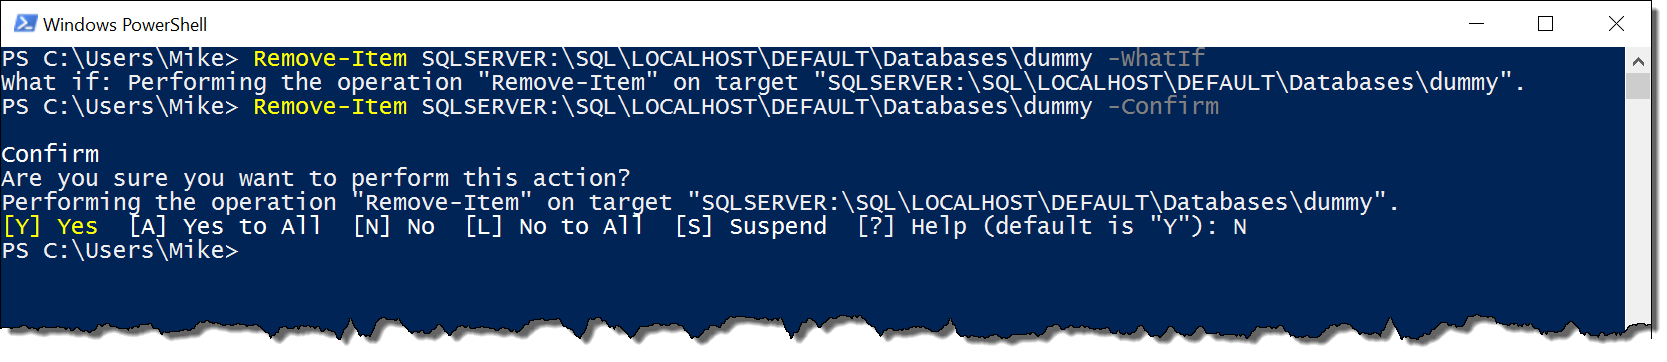
A big hurdle for using Powershell and SQL Server together is the SQLPS module. Both old and new users of Powershell don’t completely understand its capabilities. There’s also the concern of how Powershell, SQLPS, and SQL Server all interact with one another. In this session, we’ll talk about the cmdlets you may not know about, tricks to save time using the provider, and even a few gotchas on how the provider works that can save you some time and energy. We will go in depth on what happens in SQL Server when commands are run using the SQLPS module. When we’re finished, you will have a deeper understanding of how you can use SQL Server and Powershell together, along with best practices to integrate the module with your automated tasks.

Prereqs:
Minimal familiarity with Powershell, basic familiarity with SQL Server

Goals:

  • Review the SQLPS provider functionality and go over what it is and how it works.
  • Cover the cmdlets in SQLPS, how they are used and gotchas in their implementation.
  • Demonstrate practical applications for both the provider and cmdlets for SQL Server automation.

Feedback:

  • I would like to attend this session.
  • The outline seems to clearly describe the contents of the presentation.  The target audience may not be big enough to support this session.  The subject matter does not appear to match the experience level (somewhat advanced topic for a 200 level session).
  • abstract: detailed
    topic: goals not compelling
    Subjective Rating : so and so

My thoughts:
The biggest take away here is “The target audience may not be big enough to support this session.” I think that’s true, and the reason is a double edged sword. Many view PowerShell as a niche topic, so there might not be as much demand for this. However, the whole reason I talk about PowerShell and SQL Server (and I submit sessions like this) is to try and move it beyond being a niche topic. This session is intended to get more people excited about PowerShell by seeing what it can do and how to get over some of the hurdles of working with it.

That being said, I had an advanced PowerShell session at last Summit that was deeply technical and still had 300 people in the audience. Maybe it’s not quite as niche as I thought. However, I believe I need to focus on sessions with more general appeal for future Summits.

#TSQL2SDAY: SQL 2016 Direct Seeding

It’s been awhile since I’ve written a T-SQL Tuesday post, but thanks to Michael Swart(@MJSwart) for hosting this month’s edition. The request is simple enough: blog about some aspect of SQL Server 2016. This is actually a good opportunity for me to write about a feature I’ve been meaning to get to for some time now and just haven’t had the chance.

As I tell many people, I’ve been working with SQL Server since 1999 (version 7.0) and I can’t remember being more excited about a SQL Server release. 2016 has SO many cool features, but more than that, they are features that many people who use SQL Server have been asking for a while now. It is hard for me to simply blog about one feature since there are so many. However, there has been an improvement to Availability Groups that has not gotten a lot of coverage and I think it is a game changer, especially for those of us who have to manage AGs on a day to day basis: direct seeding.

Setting Up Replicas

In SQL Server 2012 and 2014, creating an Availability Group could take a significant amount of work. One of the more tedious tasks is setting up your replica databases. This is because that you need to restore your database to your replica node in a state close enough to the primary to allow synchronization to happen. It can take several log backup restores to hit that magic window where you can join the database on the secondary node. Then, you get to do it again on the next replica!

Enter direct seeding in 2016. With this feature you no longer have to do any of the restores. You simply create your replicas with direct seeding enabled, then when you add a database to the AG, SQL Server will directly seed the database to your replica nodes. It’s surprisingly simple.

How do we enable this magic? It’s part of the AG replica creation. We still need the prerequisites, so we’ll start with the following:

  • Create a cluster
  • Enable AlwaysOn for the SQL Service
  • Create endpoints and grant permissions on those endpoints
  • The database we’re adding must be in FULL recovery mode

I, unsurprisingly, have a Powershell script that will set this all up for me. Then we can create the Availability Group with the direct seeding setting. Currently, this is only supported using T-SQL (go wizard or Powershell support), but the syntax is documented in MSDN. Let’s start by creating our Availability Group:

CREATE AVAILABILITY GROUP [ENTERPRISE]
FOR
REPLICA ON 'PICARD' WITH (
 ENDPOINT_URL = 'TCP://PICARD:5022', 
 AVAILABILITY_MODE = SYNCHRONOUS_COMMIT, 
 FAILOVER_MODE = AUTOMATIC,
 SEEDING_MODE = AUTOMATIC
),
'RIKER' WITH (
 ENDPOINT_URL = 'TCP://RIKER:5022', 
 AVAILABILITY_MODE = SYNCHRONOUS_COMMIT, 
 FAILOVER_MODE = AUTOMATIC,
 SEEDING_MODE = AUTOMATIC
)
LISTENER 'ENTERPRISE' (WITH IP (('10.10.10.101','255.255.255.0')))

ALTER AVAILABILITY GROUP [ENTERPRISE] GRANT CREATE ANY DATABASE

--Run these on the secondary node
ALTER AVAILABILITY GROUP [ENTERPRISE] JOIN
ALTER AVAILABILITY GROUP [ENTERPRISE] GRANT CREATE ANY DATABASE


There are two important lines to call out here:

  • SEEDING_MODE = Automatic
  • ALTER AVAILABILITY [ENTERPRISE] GRANT CREATE DATABASE

The SEEDING_MODE is what enables direct seeding, but we need to grant the AG permission to create databases on the node as well. Then we add the database to the AG. At this point, though, we only have node. It’s time to add a second node and watch the magic happen.

Hands Off

Once we’ve created the AG, we just add the database to it:

ALTER AVAILABILITY GROUP [ENTERPRISE]
ADD DATABASE [WideWorldImporters]

Once we’ve done this, SQL Server takes over and pushes the database out to the secondary replicas:

2016-06-14_10-27-36

That’s it! SQL Server handles all the replication for you. All is not sunshine and rainbows, however. There are still some gotchas to keep in mind:

  • You need to create the Availability Group with all its replicas at the start. You can not add replicas at a later point (I thought I had done this, but more recent testing was not working).
  • The AG must also be set up before you add any databases. You can add the database as part of the AG creation or after, but you have to have all your nodes configured before adding the database to allow direct seeding to work.
  • This is a data operation, so we “canna’ change tha’ laws a’ physics, Captain!” If you add a database to an AG with direct seeding, SQL Server still has to copy all the bits and bytes across the wire to the nodes. Which means nodes in other geographical locations could be a problem.

Overall, direct seeding is pretty cool, but still feels a little raw to me. Personally I’d like to be able to seed to a replica I add to the cluster if I desire, but that does not work right now. The lack of GUI and Powershell support (both cmdlets and SMO) is also disappointing. I can still use it, but I’d rather have a simpler way to do it.

For some additional reading, Erik Darling wrote about the exact same feature for T-SQL Tuesday as I did, so it gives you another view at it. Otherwise, that’s it for me on this T-SQL Tuesday. Thanks to Michael Swart for hosting this month. Make sure you check out the rest of the T-SQL Tuesday posts!

Azure SQL Databases with #Powershell: Exporting and Importing

Previously we went over how Azure handles regular backups of your Azure SQL Databases. It is such a huge weight off an administrator’s shoulders when we only have to worry about restoring a database if something goes wrong. While many DBAs might struggle with letting go of the need to control and manage their backups, I think most of us will embrace the freedom from the tedium and worry of keeping an eye on this part of our disaster recovery.

There still is a need to take a backup of some sort. Over my career, while I have used backups for protecting my data, I have also used them for other tasks. Sometimes it is to snapshot the data at a point in time, such as before a code release or a major change. Other times a backup can serve as a great template for creating a new application database, especially if you have a federated database model. Whatever your use case, there are times we would need to snapshot a database so we can restore from it.

Exports

One approach would be to just mark down the time you want to use as your backup and restore from there, but this approach could be difficult to control and be tricky to automate. Azure offers us a better option: exporting the Azure SQL database in question to blob storage. We can restore (or, more precisely, import) this export to a new database.

To run an export is a simple call to the Start-AzureSqlDatabaseExport cmdlet. Just like the restore cmdlet, it will start the process in the Azure environment, running in the background while we do other work. To run an export, we need the following information:

  • Azure SQL database to export
  • The administrative login for the server hosting your Azure SQL Database (which we will define as a SQL Server storage context)
  • The storage container information

The only mildly frustrating thing with the export we need to use cmdlets from both the Azure module and the AzureRM module (assuming your storage blob is deployed using the resource manager model). Because of this, make sure you run Add-AzureAccount and Login-AzureRMAccount before you get started.

We first need to create a connection context for our Azure SQL Database instance, using a credential for our admin login and the server name/

$cred = Get-Credential
$sqlctxt = New-AzureSqlDatabaseServerContext -ServerName msfazuresql -Credential $cred

Once we have established our SQL connection context, we will then need to set our storage context using a combination of AzureRM and Azure cmdlets.

$key = (Get-AzureRmStorageAccountKey -ResourceGroupName Test -StorageAccountName msftest).Key1
$stctxt = New-AzureStorageContext -StorageAccountName msftest -StorageAccountKey $key

Now we can then start the export. Notice, we need a name for the export, used in the BlobName parameter.

$exp = Start-AzureSqlDatabaseExport -SqlConnectionContext $sqlctxt -StorageContext $stctxt -StorageContainerName sqlexports -DatabaseName awdb -BlobName awdb_export

Since this only starts the export, we need a way to check on the status. We can check using Get-AzureSqlDatabaseImportExportStatus. Oddly enough, the status cmdlet requires the username and password to be passed separately and does not take a credential object.

Get-AzureSqlDatabaseImportExportStatus -RequestId $exp.RequestGuid -ServerName msfsqldb -Username $cred.UserName -Password $cred.GetNetworkCredential().Password

And then there is our blob.

2016-05-14_11-23-48

There are two gotchas to keep in mind with both the export and the status. The first is you can not overwrite an existing blob, so make sure your blob name is unique (or get rid of the old one). Also, you can not check on the status of an export that has finished. If you get an error, chances are your export has completed.

Imports

Once we have our export, we now have a “backup file” we can create new databases from. All we need to do is run an import of our blob. Just as for our export, we need some information for our import, which we will (unsurprisingly) run with Start-AzureSqlDatabaseImport.

  • The storage container and blob that we will import from
  • A destination server and credentials for the server
  • The name for our database

Now, since we are creating a new Azure SQL Database with the import, the process needs to define a service objective. By default, it will import the database at standard 0 (S0), but you can defined a higher or lower edition if you want. To simplify things, we will go with the defaults and use the contexts from above, so all we really need to do to kick off the import is:

Start-AzureSqlDatabaseImport -SqlConnectionContext $sqlctxt -StorageContext $stctxt -StorageContainerName sqlexports -DatabaseName awdb_imp -BlobName awdb_export

Which, when completed, gives us a new Azure SQL Database created from our export blob:

2016-05-14_11-56-01

The Secret Sauce

What makes this black voodoo magic work? Is this some proprietary technique Microsoft has snuck in on us? Surprisingly, this is a bit of technology that have existed for sometime now as part of SQL Server Data Tools called BACPACs. A BACPAC is essentially a logical backup of a database, storing the schema and data as SQL statements.

This differs from a typical SQL Server backup, which stores your database pages directly in a binary format. Because of this, native backups are smaller and can be made/restored faster. However, they are more rigid, as you can only restore a native backup in specific scenarios. A logical backup, since it is a series of SQL statements, can be more flexible.

I don’t know why Microsoft went with BACPACs over some native format, but because they did,we can also migrate a database from on-premise SQL Server to Azure SQL database. This is a follow up to a common question I get: “How can I copy my database up to Azure SQL Database?” I want to look at this in my next post. Tune in next week, where we will create a BACPAC with regular SQL Server database and migrate it up to Azure SQL Database. 

Azure SQL Databases and #Powershell: Database Restores

logoAzureSqlA database administrator’s first priority is to ensure their datais protected in the event of a disaster. Typical scenarios range from someone forgetting a WHERE clause to completely losing the data center that houses our servers. We are charged with thinking through all the possible scenarios and making sure we can support our company’s Recovery Time and Recovery Point Objectives (RTO and RPO). This sort of responsibility is a lot why being DBA is a tough job.

Owning our servers gives us a lot of control of how our disaster recovery is constructed, but also a lot of responsibility. This can be a real challenge. We already know that cloud services, like Azure SQL Database, take that responsibility away by managing the infrastructure behind the scenes. These services also provide much of the disaster recovery protection, which is much more comprehensive and (in most cases) cost effective. In this post, we will review these options and how they can be managed using Powershell.

A Big investment

The most fundamental form of disaster recovery is database backups and restores. Typically setting up backups is a lot of work. DBAs need to make sure there’s enough storage available for backups, create schedules that accommodate business operations and support RTOs and RPOs, and implement jobs that execute backups according to those schedules. On top of that, there is all the work that has to be done when backups fail and making sure disk capacity is always large enough. There is a huge investment that must be made, but it is a necessary one, as losing a database can spell death for a company.

This is one of the HUGE strengths of Azure SQL Database. Since it a service offering, Microsoft has already built out the backup infrastructure for you. All that stuff we talked about in the previous paragraph? If you use Azure SQL Database, you do not have to do any of it. At all.

What DBAs still need to manage is being able to restore databases if something happens. This is where Powershell comes into play. While we can definitely perform these actions using the portal, it involves a lot of clicking and navigation. I would much rather run a single command to run my restore.

Executing a Restore

Before we get started, we need to first load up the classic Azure module. While our work so far has been done with the AzureRM module, there are many Azure SQL Databases tasks that can only be managed using the Azure module and database restores are one of them. Unfortunately, it also means we have to login to our Azure account a second time, as authentication is managed separately between the modules. Using Add-AzureAccount is just like Login-AzureRMAccount and will bring up a graphical dialog for you to sign in with.

Import-Module Azure
Add-AzureAccount

2016-05-07_12-25-46

To restore a database, first we just need three things to start: the server where the original database came from, the name of the database we want to restore, and a name to restore the database as. When you restore an Azure SQL Database, you have to create a database that does not already exist, so there is no WITH REPLACE option. Starting the restore is then just a matter of calling the right cmdlet:

Start-AzureSqlDatabaseRestore -SourceServerName msfazuresql -SourceDatabaseName msfsqldb -TargetDatabaseName msfsqldb-restore

2016-05-07_12-37-34

This only initiates the database restore operation and we have to wait for it to complete. To check on the status, we can use another Powershell cmdlet to display that information.

Get-AzureSqlDatabaseOperation -ServerName msfazuresql -DatabaseName msfsqldb-restore | Sort-Object LastModifyTime -Descending | Select-Object -First 1

2016-05-07_12-57-24

All the pipeline calls are there to filter out additional operations and only show the most recent, as the cmdlet returns all restore operations that have ever happened for that server and database. It is difficult to predict how long a restore will take, as this is all handled behind the scenes. I have not tested restore times, but my test databases usually take a few minutes to restore.

There are other options we can declare, depending on how we want to manage our restore, including:

  • Point in time within a minute of when we want to recover.
  • An optional destination server that we want to restore the database
  • A dropped database as our source

One other gotcha to be aware of, albeit a minor one, is that you can not perform a restore of an Azure SQL Database until 15 minutes after the creation of the database. This should not be a concern for most, but it can get in the way of rapidly spinning up databases for demo purposes (ask me how I know!).

Other Scenarios

Simple database restores is the entry point for most recovery scenarios. There are other options for disaster recovery as well as managing copies of your database. There are other options within the platform to support these scenarios. In the next post, I want to dive into a couple cmdlets that we can use to copy our Azure SQL Database as well as make a “backup file” to Azure blob storage that can be used to store a copy of our database in a particular state.

Azure SQL Databases with #Powershell: Managing your Databases

I meant to write this post a month ago, but then life happened. This is a continuation of my short series on Azure SQL Database and how you can manage it with Powershell. If you want, you can go back and read the previous two posts: Getting started and creating your database.

Administrative Access

Now I’d like to show you how to connect to the database, but since it’s been so long since I’ve looked at this demo, I’ve forgotten my administrative password! While it would be simple to blow away the Azure SQL server and database, there are many situations where this is not possible. Fortunately we have an easy way to reset the administrative password using the cmdlets.

$pw = ConvertTo-SecureString -AsPlainText -Force '********'
Set-AzureRmSqlServer -ResourceGroupName MSFAzureSQL -ServerName msfazuresql -SqlAdministratorPassword $pw

Walking through this, we just need to create a secure string for our password and then use the Set-AzureRmSqlServer cmdlet and pass the secure string to -SqlAdministratorPassword argument. Easy as that and we don’t even need to know what the previous password was. With this in mind, I also want to call out that you can only change the password and not the admin login name. While this is not such a big deal, be aware that once you have an admin login name, you are stuck with it.

Connecting and Querying

Armed with our reset password, now we can query the database. The easiest way for you to do this is to connect to your database with SQL Server Management studio:2016-04-30_10-20-41

Remember that your server name will be what you named it followed by “.database.windows.net”. You must have SQL Server Authentication selected, and then just enter your login and password. SSMS will then connect up to your Azure SQL Database and the rest is very much like managing your on premises databases.

What about using Powershell? Again, not all that different. Let’s run a basic query to get some information about our database using Invoke-SqlCmd:

$sql = @"
SELECT
DATABASEPROPERTYEX ( 'msfsqldb' , 'Edition' ) as Edition
,DATABASEPROPERTYEX ( 'msfsqldb' , 'ServiceObjective' ) as ServiceTier
,DATABASEPROPERTYEX ( 'msfsqldb' , 'Version' ) as Version
,convert(bigint,DATABASEPROPERTYEX ( 'msfsqldb' , 'MaxSizeInBytes' ))/1024/1024/1024 as MaxSizeGB

GO
"@

Invoke-Sqlcmd -ServerInstance msfazuresql.database.windows.net -Database msfsqldb -Username msf -Password '*********' -Query $sql

2016-04-30_10-39-00

As you can see, working with Azure SQL Database after it has been created and configured is not much different than your typical SQL Server installation. There is a lot of writing out there on features and use of Azure SQL Database, so I will skip that here. The best place to start is Grant Fritchey(@GFritchey) and his Azure blog posts.

Remaining Flexible

The last item I want to cover here is managing your database size. One of the promises of the cloud and Azure is the flexibility to change your resources as your needs demand and not be stuck on whatever hardware you purchased when you first built your data center. There are a couple items you should consider when first creating your Azure SQL Database, but the great thing is that you are not tied into many of those options permanently.

There are several service tiers available to you, with a mix between standard and premium offerings. Obviously, each service tier has a different price point, so how do you know what is the right choice for your database? What complicates this is you have a mystery metric for performance: Database Transaction Units. Ostensibly this is the number of transactions per second your database should be able to provide, but there’s more to it than that. My general recommendation is you should base your choice on features you need and user connections you expect. If you find, after that, you have a performance bottleneck, you can adapt upwards incrementally.

How do you make this change? It is just one line of Powershell:

Set-AzureRmSqlDatabase -ResourceGroupName MSFAzureSQL -ServerName msfazuresql -DatabaseName msfsqldb -RequestedServiceObjectiveName 'S1' 

Then it is off to the races. The actual operation is not instantaneous and Azure needs some time to allocate the resources and adjust the settings on its side. The great news here is this does not interfere with the operation of your database at all and it will be available while the resizing happens. Existing connections will be maintained and even queries that are running will continue to run. The end result will simply be:

2016-05-01_18-18-03

Ease of Use

As you can see, we can manage the access and scale of Azure SQL Database with a few straightforward commands. While these changes can also be managed through the web portal, I find the Powershell approach to not only be simpler, as we can skip all the browsing through blade windows and troublesome clicks. While these actions are not really ones we would automate, using the cmdlets can also ensure that our actions can be more precise and consistent.

In my next post, I want to cover a topic near and dear to the hearts of DBAs everywhere: database restores. While backups for Azure SQL Database are managed for us, we need the ability to restore our data to a point and time of our choosing. Fortunately this is fairly easy to accomplish with Powershell. Stay tuned and I promise you will not have to wait another month for me to demonstrate this.

Azure SQL Databases with #Powershell: Components

As with any project, before we can start, we need to know what we have to work with. Last post, we went over loading the Azure RM module and getting connected to our Azure account. Before I go over how you create the Azure SQL databases, I’d like to talk first about exactly what we will create first. It’s the old adage: measure twice, cut once.

The very first thing to create is an Azure Resource Group, as we are going to create our Azure SQL Database using the Azure Resource Manager deployment model. There’s nothing really fancy about this, just that it is a container that can house multiple resources. This resource group can house any Azure resource, not just our databases. Creating one using Powershell is simple, we just need to know what to call it and which Azure region to create it in:

New-AzureRmResourceGroup -Name MSFAzureSQL -Location ‘West US’

Once we have our resource group, we can start deploying our Azure SQL database components.

Parallels

From a logical standpoint, working with Azure SQL databases is not very different from setting up a SQL Server instance and database in your environment. There are 3 main components we will need to deploy:

  • A server
  • A database
  • A firewall (server or database)

3-20-2016 7-27-15 PM

Starting with the server, there are only a few things we need to know. The first is a server name so we can identify and connect to it. After that, we need to know what version of Azure SQL databases we want. There are two options here, 11 and 12. Yes, those are fairly abstract numbers, though version 12 is currently what is being updated and has many of the features that will be included in SQL 2016. Finally we need to create an administrative login, the equivalent of the sa login found in all SQL Servers. This all boils down to just two lines of Powershell:

$cred = Get-Credential
New-AzureRmSqlServer -ResourceGroupName MSFAzureSQL -Location ‘West US’ -ServerName msfazuresql -SqlAdministratorCredentials $cred -ServerVersion '12.0'

Running this, in my opinion, beats all the clicking and selecting you have to do in the portal.

Next up, we need to create our database. As with creating a server, we need a name for the database. We also need the resource group and server name we are creating the database in. We will then need to declare a service level objective. While there is a performance aspect to this selection, it more rests on what sort of connection load you will have, what kind of features you need, and what sort of disaster recovery support you require. The nice thing about selecting a service level is their easy to change once you have your database. Finally, we need to select an edition (again, relates to features). To deploy, our command looks like this:

New-AzureRmSqlDatabase -ResourceGroupName MSFAzureSQL -ServerName msfazuresql -Edition Standard -DatabaseName msfsqldb -RequestedServiceObjectiveName 'S0'

Security and Access

The final component to create is a firewall. By default, your Azure SQL Database has its access blocked to anything outside of it. Yes, this includes your access via management studio. To open this access, we need to create firewall rules that allow specific IP addresses to connect. There are two types of firewall rules we can use, server and database. These are what you would guess. The server rule allows access from that address to any database in your server, where the database rule only works for that database.

For our purposes, the server rule will work just fine. Creating a database rule is not really different, it just applies to a different scope. To create a rule, we need the resource group name, server name, rule name, and an IP address range. For this, we will use a trick I picked up from John Milner(@JFRMilner) to get our external IP and create a firewall rule for it:

$localIP = (Invoke-WebRequest ifconfig.me/ip).Content.trim()
New-AzureRmSqlServerFirewallRule -ResourceGroupName MSFAzureSQL -ServerName msfazuresql -FirewallRuleName 'msffirewall' -StartIpAddress $localIP -EndIpAddress $localIP

Now, there is also a special firewall rule we can use. This one is handy because it will make your database accessible to all Azure services. This saves you the headache of creating separate rules for websites, PowerBI, or any other service you want to use. Just call the firewall rule cmdlet with -AllowAllAzureIPs:

New-AzureRmSqlServerFirewallRule -ResourceGroupName MSFAzureSQL -ServerName msfazuresql -AllowAllAzureIPs

Fully Functional

With that, we now have a functioning Azure SQL database. To connect to it, you just need to use the servername along with database.windows.net as your connection string, along with the admin login you created. Put it into management studio and you are good to go:

3-21-2016 5-04-05 PM

Oh, you want the full script?

New-AzureRmResourceGroup -Name MSFAzureSQL -Location ‘West US’

$cred = Get-Credential
New-AzureRmSqlServer -ResourceGroupName MSFAzureSQL -Location ‘West US’ -ServerName msfazuresql -SqlAdministratorCredentials $cred -ServerVersion '12.0'

New-AzureRmSqlDatabase -ResourceGroupName MSFAzureSQL -ServerName msfazuresql -Edition Standard -DatabaseName msfsqldb -RequestedServiceObjectiveName 'S0'

$localIP = (Invoke-WebRequest ifconfig.me/ip).Content.trim()
New-AzureRmSqlServerFirewallRule -ResourceGroupName MSFAzureSQL -ServerName msfazuresql -FirewallRuleName 'msffirewall' -StartIpAddress $localIP -EndIpAddress $localIP
New-AzureRmSqlServerFirewallRule -ResourceGroupName MSFAzureSQL -ServerName msfazuresql -AllowAllAzureIPs

As you can see, deploying an Azure SQL database is a pretty simple process, it is just a matter of knowing what you need.  Next up, we will go over how you can manage and alter your Azure SQL Database. After all, the cloud promises us flexibility and using Powershell makes it easy.

Azure SQL Databases with #Powershell: Getting Started

I’m now a month into my new gig at UpSearch and loving it. The most interesting thing about moving from being a corporate world to being a consultant is the variety of work that I get to do. As tech folks, part of the reason we work in this field is because of all the things we get to learn.

One new area for me has been Azure SQL Databases. Sure, I’ve known about them for a while now, but it was never something that was needed by my corporate masters. Now, with several different clients to work for, it did not take long for Azure’s platform-as-a-service database offering to be a good fit for a project. Since this is me we are talking about here, I made a point of learning how to create and manage these databases in Powershell. I’d like to share some of those lessons here.

The Tools

Before we get started, we need the right cmdlets for working with Azure. With Windows Management Framework 5.0, it is actually really easy to install and get started with Azure and Powershell. The full process is documented up on Microsoft’s site. It takes about 30 minutes to get everything installed and configured.

If you have worked with the Azure cmdlets before, you might be surprised to see that the instructions references two different modules, Azure and AzureRM. Actually, if you do a lookup on any modules you will see a lot more:

Get-Module -ListAvailable  Azure* | Select-Object ModuleType,Version,Name

3-12-2016 11-48-54 AM

What is this all about? It took me a bit of digging, but what it boils down to is that Microsoft made a fundamental change to how things are managed within Azure. You will now find documentation on these two different deployment models: Classic Deployments and Resource Manager Deployments. These two different set of Powershell cmdlets reflect these different models, as anything for Classic Deployments are handled by cmdlets in the Azure and Azure.Storage modules. All the Resource Manager Deployment stuff is handled by the AzureRM* modules.

Choose Your Path

The reason I call this out is to address one major hangup with working with Azure: the documentation. Because Azure is changed so quickly, official documentation and other write ups (like this one) quickly go out of date. When I was looking for information on how to do this, I kept finding blog after blog that covered Classic Deployments. Since I am just starting with this, there is no reason for me to go down the Classic Deployments path. While these are still viable and perfectly valid, it makes more sense to me to focus on using Azure the way Microsoft intends it to be used.

To get started, we will first connect to our Azure RM account. I will be using my MSDN account. From my Powershell window, I’ll run the following commands:

Import-Module AzureRM
Login-AzureRMAccount

I am then greeted by a GUI login window, where I enter my credentials.

3-12-2016 12-35-48 PM

Hey, wait? A GUI? With Powershell? Yeah, this surprised me as well, because to me GUIs are an aberration when it comes to Powershell. You can not really automate them and that throws a wrench into the whole works. This is probably my biggest gripe about using these cmdlets. The nice thing is that once you login your session is maintained and you can make use of a session profile.

Thanks out to Adam Bertram(@adbertram) for helping me with this, but you have the ability to save off a profile file that will save a lot of this info for use by other Powershell sessions. This gives us the ability to connect and run commands without the need for this GUI nonsense. Accomplishing this is just a matter of using the right cmdlet:

Save-AzureRmProfile -Path C:\Users\Mike\mfalprofile.apf
Select-AzureRmProfile -Path C:\Users\Mike\mfalprofile.apf 

Note, the name of the file is pretty meaningless. I used the apf extension because of my own personal taste, but you can do whatever you want. The point is to have the file. Once you have this file, you can load it up in future/different Powershell sessions and avoid the login GUI completely. The real hurdle here is that, regardless of how you go about this, you need to login graphically at least once to get credentials.

First Steps

With our connection established, we can now start creating SQL databases. Before we do, however, we need to talk more about what we are going to create. While the beauty of working with public cloud providers such as Azure is it is really easy to spin up resources, it does not negate the importance of understanding how and what we are deploying to. It is just as important to “measure twice, cut once” when it comes to the cloud. My next post will focus on the different components that make up Azure SQL databases, deployment considerations, and how we end up creating SQL databases in the cloud.