Art of the DBA Rotating Header Image

March, 2011:

Getting Started with Dynamic SQL

Since two of the scripts I’ve posted so far on Mondays involve the use of dynamic SQL code, I figured it would be a worthwhile to post on using dynamic SQL in SQL Server. After all, understanding and using dynamic SQL is one of the fundamental tools for a DBA to make management tasks automated, helping you save time and eliminate “fat fingers”.

What is dynamic SQL?

Before we get started, let’s define what we’re talking about. A quick Googling gives us a bunch of links that all describe the same process: “Dynamic SQL is a term used to mean SQL code that is generated programatically (in part or fully) by your program before it is executed”. What this means to us is now we can take SQL code that we want to run repeatedly with some changing parts, and write it in a way where those changes can be handled by other logic and keep the rest of the query unchanged, saving us a whole lot of time and effort.

Parametrization and code reuse

We’ll use my sp_spaceused script to show dynamic SQL in action. First off, we should review what the objective of that script is: running sp_spaceused to give us information about the size of the tables in our database in context with the other tables. Since the stored procedure only gives us information one table at a time, we need a way to gather all that information without having to run each query separately. We know that because the stored procedure accepts the table name as a parameter, the core code will remain the same no matter what we pass to it, so we only need to handle the changing table name.

Let’s look at the code:

declare recscan cursor for
select name from sysobjects where type = 'U'

open recscan
fetch next from recscan into @curr
while @@fetch_status = 0

begin
insert into @return
exec sp_spaceused @curr

fetch next from recscan into @curr
end

In the first two lines, we have a SQL cursor. If you need more information on cursors and how they work, hit up MSDN, but the short version is they give us a way to create a data set that we can use programmatically for processing. In this specific case, I’m building a data set of all the user tables in my database.

The next part is to open our list of table names and grab the first item in it. I’ll take that table name (the next available value in my cursor) and stuff it into a variable. Now I can use the stored procedure, with my variable as a parameter, to execute the code and get my return set. The rest of a the code is a simple loop that will continue until the SQL engine can no longer fetch a value from the cursor.

At the end of the day, we have two pieces that make this work:

  • A static set of code that performs the same task, but with a parametrized value that can alter the target of that task.
  • A programatically changing data set that we can use to provide the parameter for our code statement, so we can apply the same work to different targets.

But is this really dynamic SQL, since all we’re doing is using a stored procedure driven by a changing parameter? Sure thing, because while the stored procedure code remains the same, we are changing the parameter programmatically. We aren’t limited to just using stored procedures, though. While there are a lot of advantages to using stored procedures, such as pre-compiled SQL statements and making use of the procedure cache, sometimes you need something more fine grained. Fortunately, SQL server provides us with a couple other methods to execute dynamic SQL.

EXECution time

We can also use the EXECUTE function for more than just calling a stored procedure. It will also accept a SQL statement passed to it as a string. Let’s see how this works by modifying our script to get the number of tables in each database instead of the space used:

declare @sql varchar(max)
declare @db varchar(100)
declare @return table
(db_name varchar(100),
table_count int)

declare recscan cursor for
select name from sysdatabases where dbid >4

open recscan
fetch next from recscan into @db
while @@fetch_status = 0
begin
set @sql = 'select '''+@db+''',count(*) from '+@db+'.sys.objects where type = ''U'''

insert into @return
exec(@sql)
end

close recscan
deallocate recscan

select * from @return

Now we can take our SQL statement and change the database context programmatically, allowing us to reuse the same query over and over again.

SQL Server also provides the sp_executesql stored procedure as an alternative to using EXECUTE with two major differences. The first is that sp_executesql allows you to use parameters within your dynamic statement, so it allows you a cleaner option for parametrization. The second is you can use it to capture an output parameter, giving you some other options for using the data, though you are limited in using the statement output within an insert.

Finally, we can also make use of two undocumented stored procedures in SQL server, sp_MSforeachtable and sp_MSforeachdb. Just like they’re names imply, you can use these stored procedures to execute a SQL statement against every table in a database or every database on a server. While they don’t offer you as much control over your execution, they are pretty handy.

I’ve found dynamic SQL to be a huge time saver, since it is so flexible and powerful. With it, I can build out scripts to perform any number of tasks that remain the same, giving me the security in knowing that the task will run the same way, no matter how my parameters change.  Keep in mind that, while we only used SELECTs for the examples, you can use any SQL statement you normally would write ad hoc. For additional information and examples, I highly recommend Introduction to Dynamic SQL on SQLTeam.com, which will provide you more detailed information on the use of the different methods, as well as permissions and scope.
 

Monday Scripts – Adding database roles in bulk

As DBAs we’re in charge of granting access for our databases. Typically we can handle this using active directory groups and SQL Server Management Studio, but this can turn in to a pretty cumbersome and tedious task as the number of databases we have to manage grows. Currently, it’s not unusual for a user to ask me for read permissions on a server that has 20+ databases.   Since it doesn’t really make sense for me to add that user manually to each database on the server (both for time and the likelihood that it will create an error), I’ve created this script for adding a user to the same roles in every user database across a server.

/*Get Database Cursor*/
declare recscan cursor for
select name
from sys.databases
where name not in ('master','tempdb','model','msdb')

/*declare variables*/
declare @db varchar(100)
declare @sql varchar(4000)
declare @user varchar(100)
declare @roles varchar(max)
declare @role varchar(50)
declare @winuser bit
declare @message varchar(max)

/*string parsing variables*/
declare @strpos int
declare @strlen int
set @strpos = 0

/*Set user name and roles to be assigned, comma separated string.
@winuser defines if user is windows(1) or not(0).*/

set @winuser = 0
set @user = <INSERT USER NAME>/*User name, such as DOMAIN\msfal for windows or report_reader for direct db login*/
set @roles =<Comma list of roles>/*i.e.'db_datareader,db_datawriter'*/

/*create server login*/
Print 'Creating user ['+@user+'] on server...'
if @winuser = 1
begin
	set @sql= 'USE [master] CREATE LOGIN ['+@user+'] FROM WINDOWS WITH DEFAULT_DATABASE=[master]'
end
else
	set @sql= 'USE [master] CREATE LOGIN ['+@user+'] WITH PASSWORD = '''+@user+'!123'''
exec(@sql)

/*Cycle through DBs to assign roles.*/
open recscan
fetch next from recscan into @db
while @@fetch_status = 0
begin
	/*Add user if user does not exist in database.*/
	print 'Adding ['+@user+'] to ['+@db+']...'
	set @sql = 'USE ['+@db+'] CREATE USER ['+@user+'] FOR LOGIN ['+@user+']'
	exec(@sql)

	/*Parse role string and assign each role to the user.*/
	Print @db + char(10) + '****************************'
	while @strpos < LEN(@roles)
	begin
		select @strlen = case when charindex(',',@roles,@strpos) = 0 then LEN(@roles)-@strpos+1 else charindex(',',@roles,@strpos) -@strpos end
		select @role = SUBSTRING(@roles,@strpos,@strlen)

		print char(9)+'Adding '+@user+' to '+@role+' role in '+@db+'...'
		set @sql = 'USE ['+@db+'] EXEC sp_addrolemember N'''+@role+''', N'''+@user+''''
		exec(@sql)
		select @strpos = case when charindex(',',@roles,@strpos) = 0 then LEN(@roles) else charindex(',',@roles,@strpos) + 1 end
	end

print char(10)
fetch next from recscan into @db
set @strpos = 0
end

/*clean up cursor*/
close recscan
deallocate recscan

The script itself may look intimidating, but really it breaks down into 3 steps:

1 – Create the user as a server login
Then, for each database
2 – Create the user within the database
3 – Assign the user to the each role within the passed list of roles.

To use this script, all you need to do is set @user to the name of your user, set @winlogin to 1 or 0 if your user is an Active Directory login or not, then insert a comma separated list of roles you want to add the user to. Note, you’re not restricted to the default roles, you can use custom created roles in the script. Just make sure the role exists.

The only other item of interest here is the code section that parses through the role array. Take a look at it if you’re looking for away to split a string into its component parts using T-SQL.

Feel free to download the script here.

Virtualization at Home

As tech geeks, we love to poke, prod, and play with all sorts of new software. We love to tinker. We love to explore. Most of all we love to be able to do all of this without wrecking our own machines.  Having a sandbox where it’s easy to play and not worry about rolling back changes or uninstalling software is ideal, but that isn’t so easy to do on just one machine and very few of us have 5-10 computers that we can wipe/reinstall at a moments notice. That is, until we start building our own virtual servers at home.

I’m sure most of you are familiar with virtual servers now. I always considered it heavy hitting stuff, enterprise level tech that I really couldn’t use at home. Well, at least up until I discovered VirtualBox. Since then, I have fallen in love with this particular piece of software and I’m trying to use it as much as possible. Walk with me for a bit and I’ll show you the some of what I learned when I created a machine to host SQL Denali CTP 1. Hopefully it helps you enough so you can set up your own virtual host and take your learning to another level.

Installation

VirtualBox is available on pretty much any platform and you can download it for Windows, Linux, and Mac OS X. I’ve installed it on my XP laptop and an Ubuntu 9.0 desktop I have at home, finding both installations to be pretty straightforward. For Windows, just download the latest setup executable and fire it off. You’ll walk through the typical series of setup screens and there aren’t really any options to worry about. Ubuntu was even easier, just typing in sudo apt-get install virtualbox-4.0 with my admin password(’cause I’m a su-doer not a su-don’t-er) and off to the races.

Quick Tour

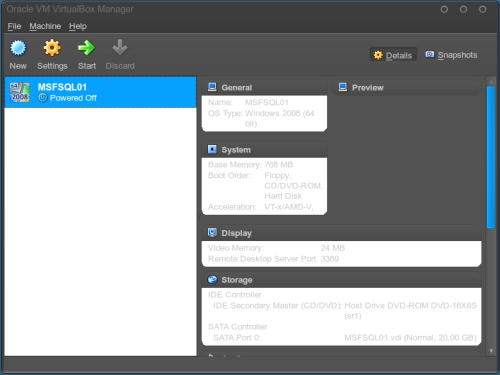
With the installation complete let’s take a quick look at the interface:

VirtualBox Main Screen

The three big buttons there at the top are really what we want to be concerned with:

  • New – Create a new machine
  • Settings – Look at the setup of the selected machine
  • Start – Power on the selected machine.

As you can see, it’s pretty simple. Of course, the devil is in the details, so let me show you how I got a machine ready for Denali.

Creating a new machine

The wizard for creating a new machine is very good, just select the OS type and version that’s appropriate (for Denali, I did Windows 2008 64-bit) and go with all the defaults. Some things to keep in mind:

  • Base Memory – This is only the minimum amount of memory VirtualBox will reserve for the machine. The virtual machine will grab whatever free memory is available on the host, so keep this in mind if you get specific with the memory settings on your SQL Server install on the virtual machine. If running multiple virtual machines, be careful that your total base memory allocations don’t exceed total memory on the box!
  • I typically do dynamically sized storage. Unless you have a space crunch on your box, it should be fine to allow it to grow.

Starting a new machine

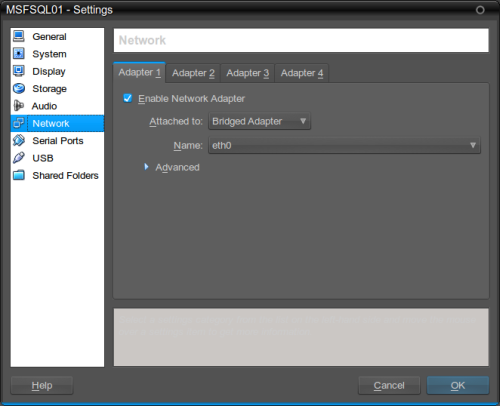
Before you actually start the machine, there’s two items you’ll want to look at first. The first thing to consider is the virtual machine’s network settings. VirtualBox offers you four options (found under Settings->Network) which are described in full detail on the manual page.

VirtualBox Network Settings

While in all cases your virtual machines will piggy-back on the host’s network card, the setting you select will determine how it shows itself to the world. I won’t get into the details of each specific setting, but this is the place where you do not want to used the default setting of NAT (Natural Address Translation). Instead, I suggest you go with one of these two settings, depending on what you intend to use the machine for:

  • Bridged Networking – This allows the machine to appear as any other machine on your local network. It can join domains and workgroups, as well as receive an IP address from your network DHCP host. I usually use this setting, since at home my virtual host machine is different than the machine where I sit and do my work.
  • Host-only Adapter – This ones a little trickier to setup, but is useful if you’re running VirtualBox on a laptop that you’re doing demos on. The virtual machine will join a network that is only visible to the host and virtual machines on that host. At this point, VirtualBox itself will act as the DHCP provider, which is setup under File->Preferences->Network.

The other gotcha to address only applies to 64-bit machines. When I created my machine for Denali, I kept getting an error message about “VT-x/AMD-V hardware acceleration has not been enabled”. After some Googling, I discovered that this is a BIOS setting and you’re basically enabling your CPU to handle virtualization. Now it’s called different things for different motherboards, so you’ll need to do a little research on yours, but for my Asus board (M4785-M) I had to enable Secure Virtual Machine Mode under Advanced/CPU Configuration. Note, you’ll only have to enable this once on your hardware.

Now we can start the machine. There’s a wizard to guide you through the first run, which all you’re going to do is tell it where the CD-ROM drive is so it can find your install media. I didn’t do anything fancy here, like mapping it to a shared folder or a network drive, and it just worked for me. On both Windows and Ubuntu, VirtualBox had no issues finding the drive and using it on boot of the new machine.

Installing the OS and software

From this point forward, everything was a normal Windows and SQL install. I used a demo copy of SQL Server 2008 R2 and had no issues with the install. While I didn’t join the virtual machine to a domain (I’m not that fancy at home), it found my local workgroup just fine(since I was using bridged networking).

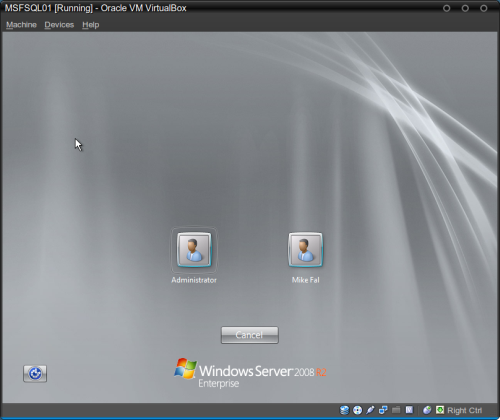
Virtual Box - Running!

The only other setup piece I had to do was to make sure the the network configuration within the virtual machine was setup properly.  First off, I disabled the Windows Firewall on the virtual machine. I’m sure with some time you could configure it appropriately, but I’m a DBA, not a network administrator.  Then I went into the SQL Server Configuration Manager and made sure Named Pipes and TCP/IP protocols for my instance were enabled.

When you’re using the virtual machine on the host (not RDC-ing into it, which is what I usually do), there’s a couple tricks to keep in mind:

  • The cursor will lock itself into the virtual machine when you click on it. To release the cursor from the virtual machine back to the host, press right CTRL.
  • CTRL+ALT+DEL is not registered within the machine itself due to the VirtualBox application. To send that command to the virtual machine, release the cursor, then in your toolbar go to Machine->Insert CTRL+ALT+DEL.

This should help you get started with virtual machines at home. While it’s not specific to SQL Server, I’ve found this tool to be immensely helpful for building demos at home and testing out new versions of the software. Hopefully this will be just as useful to you. Feel free to contact me, either by email or twitter me with any questions or experiences you’ve had using virtualization at home.


Monday Scripts – Making use of sp_spaceused

Happy Monday! One thing I’m planning to do with this blog is post useful scripts that I’ve written to hopefully make your life easier as a DBA. Nothing complex and scary, plus I hope to explain any of the particular tricks within the script so you can build upon them to fit your specific situation.

As DBA’s, we’re commonly called upon to manage the space on our servers. Usually this is just a matter of managing data files, the free space within those files, and the total space on the drives. However, there are times we need more detail. Today’s script is one I put together to use sp_spaceused, which is a stored procedure provided with SQL server to give you space information on specific objects (databases and tables, typically). It’s very handy for analyzing your tables for consumption.

The problem I ran into with the stored procedure is that it would just show one table at a time, and often I need to see all the tables in a database relative to each other. So this script is a simple cursor that executes dynamic SQL and gets all the space details for all your user tables for the current database context.

/*Create return table.*/
declare @return table
(name varchar(100),
rows bigint,
reserved varchar(30),
data varchar(30),
index_size varchar(30),
unused varchar(30))

/*Store current table.*/
declare @curr varchar(100)

/*Create cursor for all tables.*/
declare recscan cursor for
select name from sysobjects where type = 'U'

/*Use cursor to run sp_spaceused on all tables.*/
open recscan
fetch next from recscan into @curr
while @@fetch_status = 0
begin
insert into @return exec sp_spaceused @curr
fetch next from recscan into @curr
end

/*Clean up cursor.*/
close recscan
deallocate recscan

/*return data*/
select
name,
rows,
reserved,
data,
index_size,
unused
from @return
order by convert(bigint,left(reserved,len(reserved)-3)) desc

(You can download the script here.)

The only real gotchas to keep in mind is that the size values are returned as strings and the values are in kilobytes. If you need to modify them for readability/sorting, you’ll need a bit of string manipulation. See the ORDER BY clause for how I handle that.

You can also get this information from the DMVs in SQL Server. I plan on covering that in a later post. Until then, this script should take care of most of your needs and give you some additional insight into your databases.

First post and first presentation!

Last Thursday, I got a chance to present to the Denver SQL Users Group on Managing and Auditing SQL Security. I crammed a lot in for 30 minutes and got some good immediate feed back. I think the one thing that made me nervous was no one really asked any questions, but since it was my first technical presentation in a long time, I’m not sweating it.

Anyway, for those of you who attended, thanks for listening. If you have a chance, please leave me some feedback at Speaker Rate. I’d really appreciate it. For those who didn’t make it, the presentation was an overview of creating accounts in SQL Server, granting access via GRANT, server roles, and database roles, as well as queries that you can use to audit that access.

Here’s the meat for all those interested:

Powerpoint Presentation – SQL Server Security
(Please note the presentation is released under the Creative Commons Attribution-NonCommercial license)

Scripts:
server_logins.sql
server_roles.sql
server_role_audit.sql – Uses xp_logininfo
database_roles.sql
db_roles_audit.sql – Uses xp_logininfo
object_grants.sql

Enjoy!

Last Thursday, I got a chance to present to the Denver SQL User’s Group on Managing and Auditing SQL Security. I crammed a lot in in 30 minutes and got some good immediate feed back. I think the one thing that made me nervous was no one really asked any questions, but since it was my first technical presentation in a long time, I’m not sweating it.


Anyway, for those of you who attended, thanks for listening. If you have a chance, please leave me some feedback at Speaker Rate for me. I’d really appreciate it. For those who didn’t make it, the presentation was an over view of creating accounts in SQL Server, granting access via GRANT, server roles, and database roles, as well as queries that you can use to audit that access.


Here’s the meat for all those interested:

Powerpoint Presentation – SQL Server Security


Scripts:

server_logins.sql

server_roles.sql

server_role_audit.sql – Uses xp_logininfo

database_roles.sql

db_roles_audit.sql – Uses xp_logininfo

object_grants

Last Thursday, I got a chance to present to the Denver SQL User’s Group on Managing and Auditing SQL Security. I crammed a lot in in 30 minutes and got some good immediate feed back. I think the one thing that made me nervous was no one really asked any questions, but since it was my first technical presentation in a long time, I’m not sweating it.

Anyway, for those of you who attended, thanks for listening. If you have a chance, please leave me some feedback at Speaker Rate for me. I’d really appreciate it. For those who didn’t make it, the presentation was an over view of creating accounts in SQL Server, granting access via GRANT, server roles, and database roles, as well as queries that you can use to audit that access.

Here’s the meat for all those interested:

Powerpoint Presentation – SQL Server Security

Scripts:

server_logins.sql

server_roles.sql

server_role_audit.sql – Uses xp_logininfo

database_roles.sql

db_roles_audit.sql – Uses xp_logininfo

object_grants