Art of the DBA Rotating Header Image

Powershell

Defending Invoke-SqlCmd

Twitter. It can be annoying, it can be frivolous, but you’d be surprised at how many times it gives me a blog topic. This time around, I was having a back and forth with some folks about Invoke-SqlCmd. I had recommended someone try using it, which was followed by a lot of people griping about the cmdlet while suggesting other community tools or scripts should be used.

While I understand where a lot of these folks come from, I wanted to share a little, in a longer form, about why I use and recommend Invoke-SqlCmd. I think it still gets a bad rap from the PowerShell power users for some of its…quirks. I want to stand up for this handy little cmdlet, which I think is likely the most useful part of the SqlServer PowerShell module.

The .NET Root

When we start talking about Invoke-SqlCmd, what are we trying to do? At the core, PowerShell scripters need something to execute SQL commands within the context of a .ps1 script. I often speak of how PowerShell is a framework where you can tie different parts of the Windows stack together, so this ability to run SQL is needed.

One of the strongest elements of PowerShell is that it is built on .NET, which means we can always use .NET code and objects. In the case of SQL, we can use traditional ADO .NET code to execute SQL against a SQL Server instance:

$Datatable = New-Object System.Data.DataTable    
$Connection = New-Object System.Data.SQLClient.SQLConnection

$Connection.ConnectionString = "server=localhost;database=AdventureWorks2012;trusted_connection=true;"
$Connection.Open()
$Command = New-Object System.Data.SQLClient.SQLCommand
$Command.Connection = $Connection
$Command.CommandText = 'select top 10 BusinessEntityID,PersonType,FirstName,LastName from person.Person'

$DataAdapter = new-object System.Data.SqlClient.SqlDataAdapter $Command
$Dataset = new-object System.Data.Dataset
$DataAdapter.Fill($Dataset)
$Connection.Close()
$Dataset.Tables[0]

As you can see, this is pretty verbose.  We have to create a connection object and set its command string, then open the connection, execute the SQL, populate the data set, close the connection, then finally return the data set. No matter how you slice it, this is a lot of code for a simple SELECT statement.

SMOing it up

To avoid this verbosity, most programmers wouldn’t rely on the raw .NET unless they absolutely needed to. Instead, they would use existing libraries (or write their own if they had to). This is where the SQL Server Management Objects (SMO) come into play. I’ll skip the long boring explanation of what SMO is and just focus on the fact that we can use these existing libraries to simplify our call:

$smosrv = New-Object Microsoft.SqlServer.Management.Smo.Server
$query = 'select top 10 BusinessEntityID,PersonType,FirstName,LastName from person.Person'
$results = $smosrv.Databases['AdventureWorks2012'].ExecuteWithResults($query)
$results.Tables[0]

The SMO lets us reduce twelve lines of code (ignoring whitespace) to four for our SELECT output. This is the power of using existing libraries. We don’t have to reinvent the wheel for our work,which means we can focus more of our effort on everything around the SQL statement.

But what if we could make it even easier?

Keep It Simple, Sir (or Ma’am)

Three lines of code isn’t that much. The problem is that our code is a little less intuitive. Let’s keep in mind that most PowerShell scripters are not .NET programmers. Understanding dot notation isn’t necessarily difficult, but if it doesn’t come naturally to you there’s a learning curve that you have to climb.

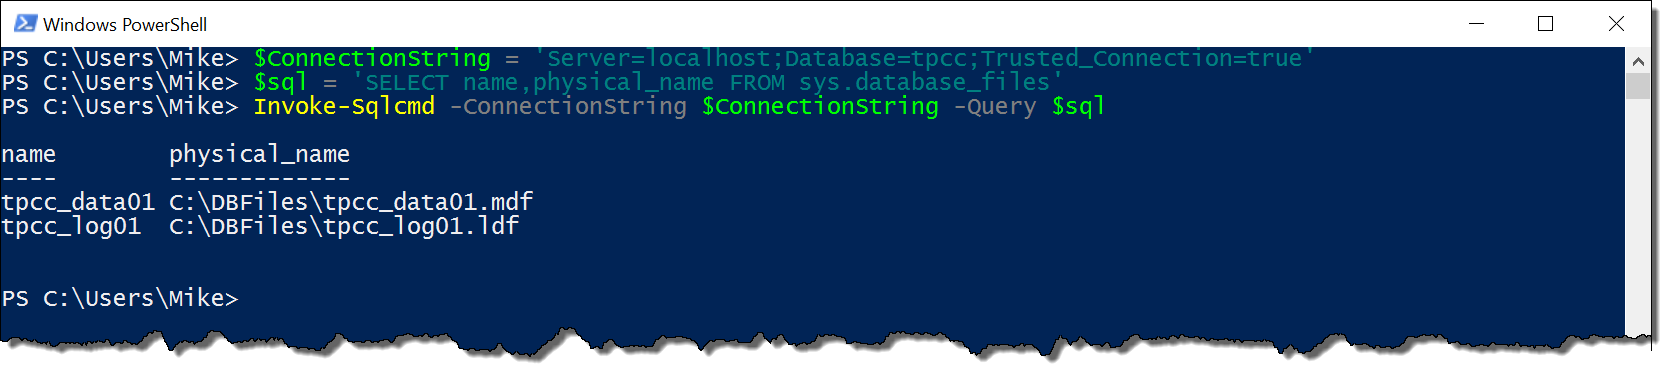
This is where Invoke-SqlCmd starts to make sense. First off, it wraps up all the functionality of the above .NET code so we can use it with the cmdlet call. Also, it follows the founding concepts of the PowerShell language, where the syntax is verbose enough to understand what you’re passing as arguments. Let’s look at our simple SELECT now using Invoke-SqlCmd:

Invoke-Sqlcmd -ServerInstance localhost -Database 'AdventureWorks2012' `
    -Query 'select top 10 BusinessEntityID,PersonType,FirstName,LastName from person.Person'

If we break this down, you can see we have a clear set of syntax for calling the cmdlet. We specify an instance, a database, and a query. The output is an array of data rows, though it could be a datatable if you’re using the most current version. Most scripters are not going to need much more than that. It’s a straightforward solution to a simple problem.

So why not?

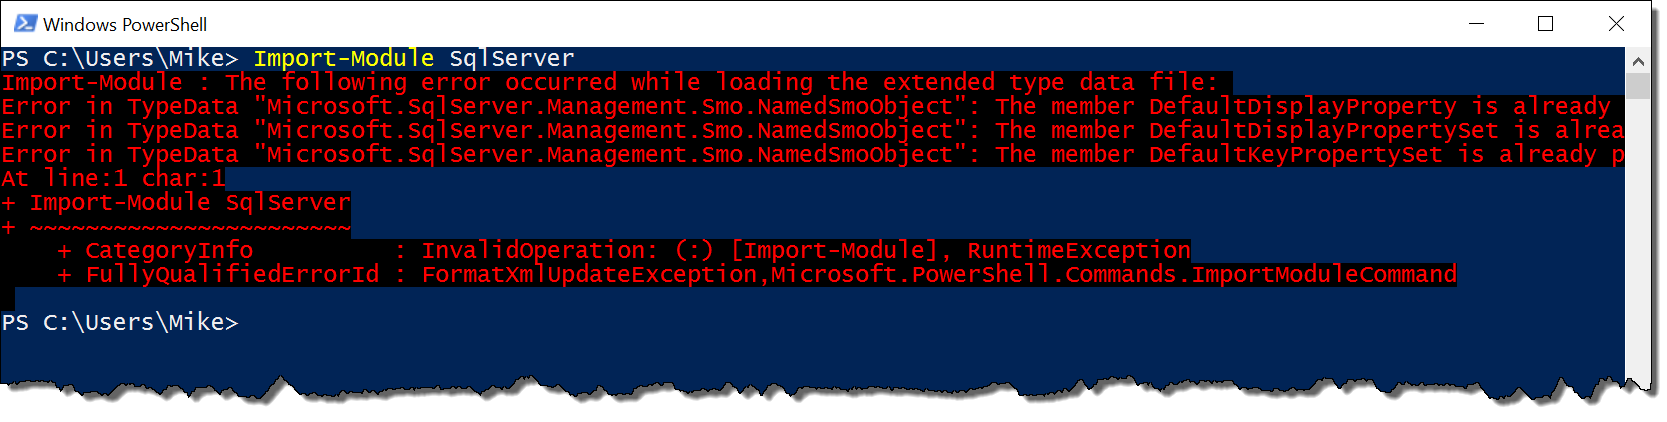
Why do people gripe so much about Invoke-SqlCmd then? Well, to understand this is to understand the history of SQLPS. For a long while, the SQL Server module for PowerShell was klunky and buggy. There were a lot of challenges with loading it and using it, such that many scripters decided to throw it out and write their own functions. In many cases, PowerShell folks would skip Invoke-SqlCmd not because it was bad, but because it came packaged with the rest of SQLPS and they wanted to avoid the entire module.

Now that the SQL Tools team has been reworking the module as SqlServer, this has become less of a concern. The module is less of a burden to load and the other components do not get in the way. There are also improvements and updates to the code to make it work better and serve more needs.

There are other reasons as well, but it usually boils down to the use case. Invoke-SqlCmd is great, but it can’t do everything. My anecdotal evidence is that the cmdlet will handle upwards of 90% of what I need it for, but there will still be edge cases. For these edge cases, we always have the more code intensive options available to us. This is why PowerShell is so great, there’s always another way, whether it’s writing more detailed code or using a community function.

To touch on this last point, this is where I also bump up against folks. There are some fantastic community functions out there. Seriously, check out DBATools if you haven’t yet. These tools enhance and expand your PowerShell experience and I make heavy use of these tools. They also have better alternatives that address the quirks of the core SqlServer module.

The rub is that you can’t always rely on community tools being available to you. Sometimes a corporate environment won’t let you install those tools or scripts. It might be that you go into a gig and they haven’t even heard of these tools. I can tell you that as consultant, I have to be very considerate of my client’s environments before I start bringing in outside code. However, because Invoke-SqlCmd is part of Microsoft’s tool set, I can rely on it being there. There are less steps and hurdles to making use of it.

Making Sense Of It All

There are a lot of reasons for using this little cmdlet. There are also reasons not to use it, depending on your situation or use case. My goal here is to not let the baby get thrown out with the proverbial bathwater. Invoke-SqlCmd is one of my favorite cmdlets in my toolbox and (most of the time) it does exactly what I need it to. Whether I’m writing scripts or working adhoc on a server, I usually don’t need a lot of fluff, just a way to execute a SQL query and sometimes get something back.

I hope you enjoyed my little love letter to Invoke-SqlCmd. I understand if it doesn’t suite your needs, but maybe you should give it another look? Or, if you’re a PowerShell newbie, you can see why using it can make your life a little easier. Wherever you go next after this blog post, I hope it is with a clearer view of how Invoke-SqlCmd can fit into your own PowerShell habits.

Query Plan Analysis with #PowerShell

A couple years ago I wrote a blog post on shredding query plans with XML. At the time, it was just an experiment. I investigated how to parse XML and a query plan without any real goal or purpose other than “what can I do with this?” Then I left it alone and didn’t come back to it.

At least not until recently. Fast forward a few years when I’m trying to tune a large SQL batch process that had a loop. It wasn’t a very pretty process and it worked, mostly, but it could definitely benefit from some performance love. The trick was trying to quantify the changes I made within. A common way to quantify this is to check logical reads. The lower your logical reads, the less “work” is typically done in your query. The trick was capturing all the executions within the loop and summing all the logical reads across a single batch execution.

At first I went to Plan Explorer. This is a great tool and had a lot of information, but what it was missing was the ability to sum up all my logical reads across the entire batch execution. I could look at each individual query, but to add these values up was going to be tedious and painful. Two things I hate.

At this point, I figured why not give PowerShell a shot? After all, I knew that the query plan was an XML doc and I could easily traverse that using the XML functionality built into the language. That combined with a little XQuery (which I’m terrible at, by the way) should solve my problem.

Armed with this knowledge, I charged ahead. Everything worked more or less as expected, but the one piece I missed from my previous blog post was using the XML namespace. See, you need the namespace so the XML pieces in PowerShell know what to query. I floundered with this for a bit until I found Jonathan Kehayias(@SqlPoolBoy) post on sanitizing query plans.

Once you have the namespace set, the rest becomes easy. To go with my previous example, the following statements allowed me to sum and compare logical reads across all statements executed in the batch:

#Read in query plan XML into XML objects
$old = Get-Content C:\Users\Mike\Documents\oldQueryPlan.sqlplan
$new = Get-Content C:\Users\Mike\Documents\newExecutionPlan.sqlplan

#Set namespace manager
$nsMgr = new-object 'System.Xml.XmlNamespaceManager' $old.NameTable;
$nsMgr.AddNamespace("sm", 'http://schemas.microsoft.com/sqlserver/2004/07/showplan');

#Query all nodes and then sum ActualLogicalReads
'Old Plan Logical Reads: ' + `
($old.SelectNodes("//sm:RunTimeCountersPerThread",$nsMgr) | Measure-Object -Property ActualLogicalReads -Sum).Sum
'New Plan Logical Reads: ' + `
($new.SelectNodes("//sm:RunTimeCountersPerThread",$nsMgr) | Measure-Object -Property ActualLogicalReads -Sum).Sum

Once the pattern is down, the use is pretty straightforward. There’s also more options accessible to you. If we just look at the RunTimeCountersPerThread node, we can compare other values such as Rows, Scans, and CPU time. We could really get crazy and extract all the different statements within the batch. There are numerous possibilities for analysis and review.

I’m not here to tell you that you should start using PowerShell to automate query tuning. Query performance is an art form and requires a lot of case-by-case analysis. However, like any great carpenter, it’s good to know the capabilities of your tool set. Understanding the options available to you not only helps you be more effective, but can also provide answers you may not have had access to.

Stuck in SQLPS

maxresdefaultA month and a half ago, with a lot of fanfare and maybe a little confetti, the SQL Server Tools Team released an update to SQL Server Management Studio that massively updated the SQL Server Powershell experience. As I blogged, this is a big deal and long overdue. I am extremely happy that this is finally getting some attention in Redmond.

However, once the dust settled and I had a chance to dig into things, I discovered that not all was rainbows and candy. The truth of the matter is that SQLPS is not so easily replaced. We are still going to be burdened with using the old module for at least the short term. This means at least being comfortable with the foibles of the old module.

Bundled With SSMS

The first real issue with the new SqlServer Powershell module is that is part of the SQL Server Management Studio install. I’ve long lamented the fact that you can’t install Powershell components separately. This means you’re limited to installing this only in locations where you can install SSMS 2016. Microsoft probably thinks you should be installing SSMS2016 EVERYWHERE, but even if you run on the bleeding edge this is a problem if you’re using Windows Server Core (no GUI, no SSMS).2016-08-11_14-41-38

I have not figured out any workaround to this. It’s possible to copy the module folder from a good install to somewhere else, but I’m nervous about that since something could be missed. This means that, until we can install this separately, users are stuck running SQLPS on servers without management studio. Yes, this means SQL 2016 without SSMS as well.

Not Recognized by SQL Agent

The second issue is that even if you do install SSMS 2016, SQL Agent won’t recognize and give you access to the new module if you use a PowerShell job step. When you create a PowerShell job step, the script in that job step runs within a specific context. It’s hidden from you, but whenever that script runs the first thing that happens is SQL Server launches sqlps.exe.

3285_72b386224056bf940cd5b01341f65e9dSqlps.exe is a “mini-shell”, which configures a few things to support SQL Server and PowerShell together. The important piece here is that the executable is hard coded to use the SQLPS module. Now, sqlps.exe is deprecated and going away, but only in a future SQL Server release. This means if you’re using anything previous to this release (having no idea when the release will happen), you are going to be forced to use the SQLPS module if you are creating a Powershell script job step.

How can you get around this? This is a trick that’s been around for a while. I try to avoid it since it adds additional layers to running PowerShell in an agent job, but it does work. What you do is create a CmdExec agent job and call the Powershell executable to run your task. This approach gives you a LOT more control on how PowerShell is working in your environment, but takes some extra work. Hat tip:Derik Hammer (@sqlhammer)

Stuck In The Past

pastLike I said before, I’m excited and happy the SQL Server Tools Team is improving the PowerShell experience for SQL Server. It has been a long time coming and I hope it continues. This is why it makes the above items SO frustrating, because while all these updates are being made, most of the user base won’t be able to use them. In a world where SQL Server installations still run on 2000 and 2005, it can take a long while to upgrade your core installation to take advantage of these improvements.

Normally, I’d be ok with this. I know that when I use an earlier version of SQL Server, I don’t get the shiny new toys. With SQLPS, though, it’s different. For all these years the experience has been klunky and problematic. While some of this klunky-ness finally got fixed back in March, most of us are still stuck with the workarounds because we do not have a way to install the updates.

What can you do about it? I’m glad you asked. Currently there are two Connect items that address these directly:

You can also make your voice heard on the community Trello board. As users, we’re at the mercy of Microsoft for updating this stuff and making it available to us. The goal is to raise awareness of these issues and let the development teams know how important they are. I will definitely give Microsoft credit for being more responsive to user feedback.


Out With The SQLPS, In With The SqlServer

This month, the SQL Server tools team released an updated version of the SQL Server PowerShell module. It is a huge leap forward for using PowerShell and SQL Server together, with the tools team making a serious commitment to correcting the sins of the past. While we still have a long way to go, this is a promising path. At this time next year, I’m certain the PowerShell/SQL Server experience will be in the best place it has ever been.

Before I share my thoughts, let me give you some relevant links. You know, in case you missed something.

Not Playing Nice

Now for my turn! First off, I want to call out that with the July 2016 update we have a new module. SqlServer replaces SQLPS, which means that all the old functionality in the old module exists in the new one (along with some nice little fixes). What I discovered is that this also means you can’t use both modules at the same time. I ran into this because my profile automatically loaded SQLPS for me. When I went to import SqlServer, I got some unpleasant red text:

2016-07-09_12-39-26

Basically, it’s a typing conflict with the SMO. Now, there’s no real reason why you should be running both modules side by side, but be aware that if you have anything that automatically loads SQLPS, you’re going to have problems. Fortunately there’s an easy way to fix this without having to restart your session:

Remove-Module SQLPS
Import-Module SqlServer

However, there’s another monkey wrench, especially for those of us using PowerShell scripts in SQL Agent jobs. Even with the release of SQL 2016 (which was just before these changes were made), SQL Agent still runs sqlps.exe and loads the SQLPS module. To check this, I made a simple agent job that executes:

Get-Module | Out-File C:\Temp\AgentPSModules.txt

The resulting output shows us the issue plain as day:

2016-07-09_12-50-13

There are ways around this, of course. The key here is awareness and I’m sure that we’ll see the SQL tools team get an update to this when possible.

Invoke-SqlCmd: Now with more flexibility!

Enough of the bad news, let’s talk about some of the improvements. As I mentioned earlier, Laerte Junior blogged about some of the updates to Invoke-SqlCmd. These changes really help make the cmdlet more useful for managing and working with outputs. However, I want to look at one specific addition more closely: connection strings!

I’ve always found the biggest limitation of Invoke-SqlCmd was that I couldn’t specify connection string parameters. This was a significant issue when working with multi-subnet Availability Groups, because I couldn’t specify MultiSubnetFailover=True, a key connection string parameter. Now I can, along with a host of other options.

Using it is pretty simple. Just declare a connection string as you would with any other application and pass it to the -ConnectionString parameter:

$ConnectionString = 'Server=localhost;Database=tpcc;Trusted_Connection=true'
$sql = 'SELECT name,physical_name FROM sys.database_files'
Invoke-Sqlcmd -ConnectionString $ConnectionString -Query $sql

2016-07-09_13-05-37

This new parameter opens up a whole new range of possibilities. I love that Microsoft is providing multiple paths to work with their tools. This means that if you’re a .NET guy who is more comfortable with connection strings, you don’t have to constantly keep looking up all the different flags and parameters of Invoke-SqlCmd. Also, if you have a situation which can not be addressed by those standard flags, you can always use the standard .NET connection string parameters and get the job.

(And yeah, I’m excited about this because it was my Connect item. :D )

Providing for the Provider

The last thing I want to touch on are a couple updates to the SQL Server provider. Now, the provider definitely has a bad name out there, but it can be a very useful tool for exploring and gathering SQL Server objects you want to work with. Since it is based on the SMO, it makes SQL Server object manipulation easier by giving you more options to collect your objects.

An important facet of the provider is that it behaves like a file system. How many of us have deleted files from the command line? Have you also used a PowerShell one-liner to delete old files, like backups? If you have, you might be familiar with two parameters: -WhatIf and -Confirm. These two switch parameters are extremely helpful because they can keep you from cutting yourself with that sharp PowerShell knife.

With the July 2016 update, the SQL Server provider now supports the use of these two switches. While using them may not be a common situation, it’s good to know that they are there. After all, it could be handy if you wanted to clean up some items from the command line, like maybe a junk database. Now you can both check what you’re going to do before you do it, along with getting a confirmation question when you go for the actual delete:

2016-07-09_13-21-52

While this may not seem like a big deal, it’s another example of how the SQL tools team is trying to get the SQL Server PowerShell module up to the standards of other PowerShell implementations. For all of us who struggle daily with technical debt, I’m sure you can understand how significant this is.

Early Days

I know the SQL Server PowerShell module still has a bad reputation with a lot of folks out there. Honestly, it’s well deserved. The SQL Server Tools team is out to fix that and everything we’ve seen over the last 3-4 months shows that commitment. A lot of this has to do with the effort put forth by the SQL Server community and the ongoing Trello board where the community is working with the tools team to suggest and prioritize changes. Want to help? Join us by contributing changes and voting up the current suggestions. Microsoft wants to make this your product and this is how we can help.

Dynamic CSV Imports with #Powershell

A common task for data folks is loading comma separated values files into databases. It can be tedious, having to figure out column layouts, data formats, and sorting bad data. This sort of Extract, Transform, and Load (ETL) task is something we would do in SSIS or a similar loading tool, but those tools require us to review the data and have a good idea of what the staging table will look like. Most of the time with CSVs, we just need a quick dump of the file into a database table so we can work with it using T-SQL, which means that I don’t want to spend a lot of time figuring out what a stage table is going to look like.

I know SQL Server Management Studio will try and help you out with the Import Data task. I have used this pretty frequently myself. However, like any other GUI tool out there, you can not automate it. It builds a one time SSIS package (which you can save) and executes it, but if it does not save much time if I have to load multiple CSV files with differing formats.

We all know my weapon of choice is Powershell. I am sure there are other approaches to this problem and my ETL/BI pals are probably reading this post in dismay (if they are reading it at all!). However, I’m pretty comfortable with the patterns in Powershell to script this process, letting me quickly load multiple CSV files without having to do a lot of work.

All Around the Table

The challenge is getting the staging table in place. We need a process that can read the CSV header and build a CREATE TABLE statement for us. Once we have that, the load is actually pretty easy. Assuming the CSV has a header row, I then use this bit of Powershell code to figure out the different columns I’m going to load into:

$source = <Path to your source file>
$Header = (Get-Content $source | Select-Object -First 1).Split(',')

Two lines of Powershell and now I have a collection of all my column names as a string array. This is where the fun begins. Now, I can not assume that the column headers will play nice as SQL column names, so I need to do a little hygiene work. I will loop through the collection and strip out any non-alphanumeric characters:

$CleanHeader = @()
foreach($h in $Header){
$CleanValue = $h -Replace '[^a-zA-Z0-9_]',''
$CleanHeader += $CleanValue
}

I could use ForEach-Object here to simplify the code, but I expand it out in a foreach loop because I might add some other logic to the header name clean up. I want to keep it simple for this example. The result is a new collection that has names I can use to create a staging table.

Next up, I will take this new collection and build out a SQL statement. This is a matter of looping through the CleanHeader collection and using those values. Since we can’t really tell what the format will be, each table column will be VARCHAR(255).

$StagingTableName = ‘CSVFileLoad’
$sql = @("IF EXISTS (SELECT 1 FROM sys.tables WHERE name = '$StagingTableName') DROP TABLE [$StagingTableName];")
$sql += ("CREATE TABLE [$StagingTableName]($($CleanHeader[0]) VARCHAR(255)")
$CleanHeader[1..$CleanHeader.Length] | ForEach-Object {$sql += ",$_ VARCHAR(255)"}
$sql += ");"

The SQL format is a typical pattern:

  1. If the table name already exists, drop it (we’re doing a drop and replace of the data).
  2. Grab the very first column name in the collection and use it to start the CREATE TABLE.
  3. Loop through the remaining column names, putting a comma in front of each column.
  4. Close the CREATE TABLE statement with a parentheses and semicolon.

This block of code is the key, allowing me to create any table structure to import my data with.  Once I have it, I just execute it using Invoke-SqlCmd as I would any other T-SQL statement, and my staging table is now in place.

Stick the Landing

Once the staging table is in place, the load is actually fairly simple. You have lots of options, but the easiest one for my money is to build a BCP call and execute that. BCP is a simple utility that has been around for a while, mostly because it is effective. The build is not difficult:

$cmd = "bcp '$Database.dbo.[$StagingTableName]' in '$Source' -S'$SQLServerName' -F2 -T -c -t','"
Invoke-Expression $cmd

For those unfamiliar with the BCP syntax, all I do is declare the destination table, the key word ‘in’ to declare that I am loading data from a file to a SQL Server table, and then the SQL Server name. The remaining parameters set the following load options:

  • -F2: Start the load with the second row, skipping the header
  • -T: Use windows authentication to connect
  • -c: The input file is character data
  • -t’,’: The column terminator is a comma

This is how I do it, but there are plenty of other options. Allen White(@SqlRunr) has written about using the .Net methods to perform a Bulk Load. You could also use the BULK INSERT command run from an Invoke-SqlCmd call. There are probably a dozen ways to skin this particular cat. The choice is up to you.

Now For Your Parting Gift

As with many of these patterns that I blog about, I have a function I have written around it. This one is Import-CsvToSqlTable. This function has some additional pieces that are best discussed by reviewing the parameters:

  • InstanceName – SQL Server Instance you are going to load to.
  • Database – Database name you are going to load to.
  • SourceFile – Source file to load
  • SqlDataType – Data type the staging table columns will be created as. Defaults as VARCHAR(255).
  • StagingTableName – Table name you will create and load into.
  • Append – If declared, the staging table will not be dropped if it already exists.

The function wraps up all the different pieces of what we talked about above. With it wrapped in a function, we now can call it for a simple data load. For this load, I am using a file from https://catalog.data.gov/ for New York City demographics:

3-5-2016 11-37-15 AM

Nothing fancy and the output shows the instance, database, table, and count of rows in that table. If we look in SQL Server, we will see the table created with VARCHAR(255) columns as expected:

3-5-2016 11-39-19 AM

We can do more, though. Let’s say we know that the file contains numbers in all the columns. It might make more sense to load them into a FLOAT or a NUMERIC datatype. We’ll declare that now. I’m also going to declare the -Verbose so I can see the detail of how the function is processing the import:

3-5-2016 11-42-53 AM

3-5-2016 11-48-58 AM

With the right parameters, not only do we have control over what we create, but we can see how it’s created and loaded into SQL Server. This can help with troubleshooting in case we try and load the wrong data type or there is some other error for the load.

This function can be useful for quick and dirty data loads, importing CSVs that we don’t want to waste a lot of time figuring out. I wrote it for this express purpose, because I did not want to get tied up clicking on buttons in the Import Data Wizard. However, I definitely do not recommend this as a full on replacement for ongoing ETL processes and standardized data loads. For any ongoing process where you know the format of your data files, there are much better options and approaches. As with any task, it is important that you use the right tool for the job, but it never hurts to understand your options.

Getting Database File Info with #Powershell

As database administrators, we are often obsessed with free space. Whether it’s on disk or in our database files, we know that if that precious resource runs out, everything we manage can come to a crashing halt. There are also the other hidden impacts, like if things slow down while files grow and possible downtime to additional storage to support the needs of our databases. This is all part of what a former manager of mine called “DBA 101” and staying on top of it is one of our higher priorities.

Fortunately, there’s plenty of tools for us to manage these metrics. It comes down a lot to personal choice. Usually this can be managed via some monitoring suite, but there are times we need a handy tool to answer questions quickly. For disks, I have a function I borrowed from the web and put into my profile called Get-FreeSpace. Using it, I can quickly answer questions about how much free space is available on any of my servers.

The Database Challenge

Databases are a little more difficult. Sure, we can use a variety of queries to gather this information and there are ways to get it. We could always use SSMS to look at a database’s properties. Personally, I like to use Glenn Berry’s(@GlennAlanBerry) DMV scripts. The problem is that it’s difficult to get a concise report across all of our databases with this. Sure, we can create scripts that execute the query against each database, looping through them all, but that’s a hassle. I want something simpler.

Once I hit these limits using T-SQL, I did some investigation to see if Powershell offered any better alternatives. It’s one of my learning tools for Powershell: take a T-SQL task I’m familiar with and redo it in Powershell to see if it is easier and/or better.

To do this, I dove into the SMO object model. This gets a little /Net-y, but the good news is there’s lots of properties we can use to get the information we are looking for. If we look at both the DataFile and LogFile classes, there are properties readily available for us. Both classes have UsedSpace and Size properties (both measured in KB), from which we can derive both available space and percentage used. All it takes is wrapping some collection and formatting logic around these objects and we’re good to go. You can see my full function up on GitHub.

Reporting on Database Free Space

I’ve done a couple new things with this function. The biggest is to build it for the pipeline. This is a significant step for me, because it makes the function more flexible. I always talk about how Powershell supports multi-server execution, so I try to build that into my functions when I can. this is no different. I also made the output a generic PSObject instead of a formatted table. This is key because it lets the user manage it as they need to, which is a database design concept that can be carried over to Powershell quite easily.

So let’s use it. Running it for a single instance is easy enough:

Get-FreeDBSpace -InstanceName ‘SHION’ | Format-Table

2-27-2016 1-23-35 PM

I use the Format-Table to give me this clean table style output, as the generic output is a list that can be hard to read. What’s cool here is that, with a single Powershell command, I can quickly report out all the necessary database file size info. It gets better, of course. Because I designed the function to take a pipeline, I can run it for multiple instances with ease:

$Instances = @(‘SHION’,’SHION\ALBEDO’)
$Instances | Get-FreeDBSpace | Format-Table

2-27-2016 1-33-48 PM

How cool is that? As an administrator, this can be invaluable when I’m evaluating an environment or instance. Still, this is a lot of information to parse. Let’s leverage the pipeline again and filter down the report to show all the files have less than 10 percent free (greater than 90% used):

$Instances | Get-FreeDBSpace | Where-Object {$_.PercUsed -gt 90} | Format-Table

2-27-2016 1-38-18 PM

How cool is that? Now we’ve got an easy report showing all our databases that could be tight on space. But wait, there’s more! We’re going to use the pipeline one last time, this time to output an HTML report showing us the information we just displayed to the screen:

$Instances | Get-FreeDBSpace | Where-Object {$_.PercUsed -gt 90} | ConvertTo-HTML | Out-File .\FreeDBSpace.htm

2-27-2016 1-44-27 PM

Easing Our Burdens

As you can see, there’s a lot of potential to how we can use this. The key to building any Powershell tool is making it as flexible and repeatable as possible. The building blocks are there, it is just a matter of how we assemble them.

You’ll often hear how you should use the right tool for the job. I love T-SQL and use it for many tasks, but this is a great example of how Powershell can complement T-SQL and give administrators a more robust way to manage their environments. Using this function, we can easily evaluate a new environment or manage our existing one. Our time is precious and tools like these can help us best use that valuable resource.

Managing SQL Error Logs with #Powershell

Whenever a problem arises, the first question I will ask is “what’s the error message?” Error logs and messages are extremely helpful, even if they feel vague. Because of this, it is vital to know how to leverage the error logs in SQL Server whenever you are troubleshooting an issue. The challenge is managing these logs efficiently and parsing them in a effective way. Powershell can offer some useful tools for reading and manipulating your logs, especially if you want to collect information across multiple SQL Server instances.

I’m not the first person to write about these methods. Buck Woody(@BuckWoodyMSFT) covers the basic method well and Allen White(@SqlRunr) has his own post that goes into more detail. I want to provide a little more information and expand on how it can be useful to you.

Getting Started

Reading SQL Server error logs is pretty simple, but requires us to make use of the SMO objects and the .ReadErrorLog() method to get the data from the log. Let’s start by simply reading the SQL Server error log and see what the output looks like (I’ll be using the SQL Server provider for this):

(Get-Item SQLSERVER:\SQL\localhost\DEFAULT).ReadErrorLog()


1-23-2016 10-46-22 AM

Nothing too surprising here, so let’s dig a little deeper. As I reiterate whenever I talk to folks about Powershell, everything is a .Net object. With this in mind, let’s see what we’re dealing with:

$log = (Get-Item SQLSERVER:\SQL\localhost\DEFAULT).ReadErrorLog()
$log | Get-Member


1-23-2016 10-50-36 AM

Look at the output’s data type, which is a System.Data.DataRow object. This is useful to us because it is a strongly typed object, not just a collection of strings, giving us better access to the data within the log.  Now we can access the properties of the output and our data directly.

Notice the highlighted properties, which are the output columns. Let’s leverage these properties to filter our data:

$log | Where-Object {$_.Text -like '*Startup*'} | Sort-Object LogDate | Format-List Text


1-23-2016 11-06-13 AM

What’s going on here? First off, we take the object and filter out only rows where the Text column/property value is like ‘Startup’. Next we sort by the LogDate column/property to make sure the data displays oldest to newest. Finally, the output is formatted to show only the Text column/property. This is all possible because of the object model.

We could get more advanced with these patterns. Allen’s blog post shows some great techniques for filtering out error messages and DBCC calls. The key point to focus on here is the behavior of the output and how we can use objects to better parse our data. Understanding these patterns really open up the capabilities of Powershell and using it for reviewing your logs.

Beyond the Basics

A gotcha to be aware of with this method is that it will only read the current active log. Depending on the last time your service restarted or when you cycle your SQL error log, data you are looking for could be in an archived log. How do we load and read these? We can retrieve this information using an index value that corresponds to the older log file:

(Get-Item SQLSERVER:\SQL\localhost\DEFAULT).ReadErrorLog(0) | Select-Object -First 5
(Get-Item SQLSERVER:\SQL\localhost\DEFAULT).ReadErrorLog(1) | Select-Object -First 5


1-23-2016 11-19-20 AM

What if we want to collect all our error logs? Or filter all of our entries based on date, not which log they are in? This is actually easier than it sounds, it is just a matter of using methods. Specifically, we can find out how many archive logs there are by using .EnumErrorLogs(), which allows us to collate all of the logs into a single collection:

$logs = (Get-Item SQLSERVER:\SQL\localhost\DEFAULT).EnumErrorLogs()
$combinedlog = $logs | ForEach-Object {(Get-Item SQLSERVER:\SQL\localhost\DEFAULT).ReadErrorLog($_.ArchiveNo)} $combinedlog | Measure-Object -Property LogDate -Minimum -Maximum | Format-List Property,Count,Minimum,Maximum


1-23-2016 11-34-29 AM

Using the .EnumErrorLogs() method, we can get a collection of objects that represent all of the archived logs. From there, we just create a simple loop (using ForEach-Object) to read each error log and add the entries into a larger collection. Finally, we filter and manage this collection in the same way we would an individual error log.

Don’t Stop Now!

I started playing with this recently thanks to Josh Luedeman(@JoshLuedeman), who had asked me about reading the SQL Agent log. I knew, based on the earlier posts I linked, how to read the SQL Server log, but I was not sure if the same methods could be used for the Agent. The good news is….absolutely!

It turns out that the SQL Server Agent class, JobServer, supports all the same error log methods. This means that all of the patterns that we have covered can be applied to parse the Agent logs:

$agentlogs = (Get-Item SQLSERVER:\SQL\localhost\DEFAULT\JobServer).EnumErrorLogs()
$combinedagentlog = $agentlogs | ForEach-Object {(Get-Item SQLSERVER:\SQL\localhost\DEFAULT\).ReadErrorLog($_.ArchiveNo)}
$combinedagentlog | Sort-Object LogDate -Descending | Select-Object -First 10


1-26-2016 9-27-19 AM
This is great because it means we have access into some of the other error logs. We could even combine our log objects for one time parsing. There are lots of possibilities here. What you should consider is the nature of the problem you are solving or process you are automating. These patterns simply become additional tools at your disposal.

We have a lot of options for parsing objects in Powershell. The key is to understand how the object model behaves. This is what really sets Powershell apart from many other scripting languages: its object aware foundation. Understanding this will open up entire new levels of functionality for you and the tasks you want to script.

Set-SqlStartupParameters #Powershell Function

Here on the heels of my last two blog posts about the Smo.ManagedComputer class, I wanted to wrap up with a function I put together to help with managing startup parameters. It is the result of the work I did to figure out how to move the master db along with the inspiration I got from Shawn Melton’s(@wsmelton) blog post on the matter.

Looking back at the previous blog post, changing the the startup parameters through the SMO is pretty easy with the ManagedComputer class. In some ways, it is too easy. As Shawn calls out, you could easily overwrite the full string and remove the startup locations for your master database (and breaking your instance). This is where tool building can be such an aid, because by wrapping the change code in a function, we can build some safety mechanisms to protect us (or others) from doing harm when trying to make this sort of change. The function I wrote is not terribly long, but I’ll spare you the whole thing by letting you view it on GitHub. We’ll use our time better by going over how I constructed it while focusing on some of my tool building principles. 

The first is trying to build around multi-instance execution. You will note that my parameter block uses a string array called Instances ($Instances):

function Set-SQLStartupParameters{
  [cmdletbinding(SupportsShouldProcess=$true)]
  param([string[]] $Instance
       ,[string[]] $StartupParameters
)

This array will drive a foreach loop inside the function, allowing me to apply the same block of code to each instance name. There are a lot of situations when I am applying changes across multiple SQL instances and I want to keep the call simple.

The second parameter is also a string array, which is a collection of the startup parameters I want to apply. While the property in the SMO is a semi-colon delimited string and will ultimately be set that way, I find that using a string array makes the collection of parameters much more manageable and readable. It is important that any tool you create is not a struggle to use.

Next up, as we walk through the function, you will see some Write-Verbose statements:

Write-Verbose "Old Parameters for $i :"
Write-Verbose $wmisvc.StartupParameters

It is easy to write a script that can execute a bunch of things, but when it starts throwing out red error text you could have a debugging nightmare. By adding these statements, I can add logging information to the output so I can see things like the old startup parameters and the string that will be added to the service for the new parameters.

The final item to call out is the meat of the function. As it has been emphasized, altering these startup parameters can be very dangerous and could possibly break the instance if we leave out the -d, -e, or -l parameters or set them improperly. I wrote this function to capture the existing values of these parameters and, if they are not being changed, keep them.

$oldparams = $wmisvc.StartupParameters -split ';'
$newparams = @()
foreach($param in $StartupParameters){
  if($param.Substring(0,2) -match '-d|-e|-l'){
    $SystemPaths = $true
    $newparams += $param
    $oldparams = $oldparams | Where-Object {$_.Substring(0,2) -ne $param.Substring(0,2)}
  }
  else{
    $newparams += $param
  }
}

$newparams += $oldparams | Where-Object {$_.Substring(0,2) -match '-d|-e|-l'}

While not the most graceful approach, the logic is as follows. Start with the old parameter block and check each new parameter. If any of the sensitive parameters are specified, remove it from the old parameter set and use the new one. Once we have gone through the new ones, pull any remaining sensitive parameters from the old set and insert them into the new. This way we should always keep a value for the sensitive parameters.

The non-sensitive parameters are a different manner. They will not be retained, but instead overwritten. This means if you want to retain an existing trace flag, you will need to include it in your new parameter set when you call the function.

Now, what this does NOT do is insure these sensitive parameters are valid. This is up to the user to make sure that the files and paths are valid. I added a warning to the function that if these values are changed, the user needs to validate them, but the rest is on the person executing the call. This function will also not restart the service to apply the changes. Because we need to be sensitive about when our SQL Server services restart, I wanted to leave that in the control of the user.

Let’s look at some examples and see how this function works. If we want to add the trace flag to suppress successful backup messages, it’s just a simple line of code:

Set-SQLStartupParameters -Instance PICARD -StartupParameters '-T3226' -Verbose -WhatIf

12-12-2015 11-23-05 AM

By specifying the -Verbose switch, all the included verbose messages I built into the function will display. Using -Whatif then gives us a chance to see what is going to happen before we actually apply it. This becomes useful both for debugging and checking that what we are doing is really what we want to do.

If we remove the -WhatIf, the change will actually be applied:

Set-SQLStartupParameters -Instance PICARD -StartupParameters '-T3226' -Verbose

12-12-2015 11-27-43 AM

This gives us all the same information, but now actually applies the change. The function is written to warn us that, while the startup parameters have been changed, we still need to restart the instance.

What about moving our master database? Let’s use last week’s example and relocate the master database as part of a set:

#Set the params as a string array
$params = @('-dC:\DBFiles\MSSQLSERVER\master.mdf',
'-eC:\DBFiles\MSSQLSERVER\ERRORLOG',
'-lC:\MSSQLSERVER\mastlog.ldf')

Set-SQLStartupParameters -Instance PICARD -StartupParameters $params -Verbose

12-12-2015 11-34-23 AM

Because of how the function is built, it displays the additional warning that we have changed the sensitive parameters. While the function can not save us from everything, it will try and provide as much information as it can to help.

I have tried to share with you some of the things I think about when building my own functions. However, I also want to call out the importance of getting other opinions. While I wrote the code, I got a LOT of help from Shawn Melton in the way of code review. He was kind enough to look over my function and suggest a few things (like the -WhatIf flag). Building code is a team effort and having a supportive community is a great way to help you create your own tools.


Moving your Master Database with #Powershell

A common best practice that many administrators do not typically apply is moving your system databases out of the default location on the C: drive. This is recommended because this way your system databases will not affect or be impacted by whatever work the OS is doing. It is a way to reduce contention and protect your SQL installation from something going awry with the OS. And while moving databases like model, msdb, and tempdb are fairly straightforward, moving master can be a real challenge.

The reason for this difference is because of how SQL Server stores the location of those database files. For model, msdb, and tempdb, these locations are stored as with regular user databases: in master. This means we can relocate them in the usual way. Master is a trickier beast because SQL Server must have knowledge of its location before it starts. How it does this via the instances startup parameters. The parameters of -d and -l specify the instance’s data and log files (respectively) for the master database. This means, if we want to move our master database files, we need to change these startup parameters.

CAUTION: Changing these values can break your instance and prevent it from starting.

Normally, to change these values, we would use the Microsoft Management Console (mmc) for SQL Server:12-5-2015 12-07-30 PM

As with many GUI based operations, this is pretty much impossible to automate and opens the door to inconsistencies and errors. You definitely could not include this into a scripted SQL Server build process. What do we do?

My answer, unsurprisingly, is Powershell. The trick is how. If you do a Google search, you will find a lot of articles on changing registry keys. This is messy and I definitely do not feel comfortable with that approach. Fortunately there is a better way.

Last week I blogged about how you can use Smo.ManagedComputer class to update service accounts for your SQL Services. My friend Shawn Melton(@wsmelton) decided to explore the class a little more and discovered how you can change your startup parameters using this class. Shawn’s examples are focused around adding common trace flags to your instance, which is a typical practice. However, let us look at using this to move master.

We will get started by first showing the current startup parameters of our instance:

[System.Reflection.Assembly]::LoadWithPartialName('Microsoft.SqlServer.SqlWmiManagement')| Out-Null
$smowmi = New-Object Microsoft.SqlServer.Management.Smo.Wmi.ManagedComputer PICARD
($smowmi.Services | Where-Object {$_.Name -like 'MSSQL*'}).StartupParameters
'--------------------------------'
($smowmi.Services | Where-Object {$_.Name -like 'MSSQL*'}).StartupParameters -split ';'

12-5-2015 12-35-07 PM

The startup parameters are stored in the object as a single string, with each parameter separated by a semicolon. This is why, to make it easier to read, I pass the output to a -split parameter so we can see them in a string array.

To change this is simply a matter of changing the StartupParameter property of the service and apply it as Shawn describes in his post. We should be careful, because if we screw this up the SQL instance will NOT start. With that out of the way, let’s first script out changing the location of master:

#Set the params as a string array
$params = @('-dC:\DBFiles\MSSQLSERVER\master.mdf',
'-eC:\DBFiles\MSSQLSERVER\ERRORLOG',
'-lC:\MSSQLSERVER\mastlog.ldf')

#Get the Service
[System.Reflection.Assembly]::LoadWithPartialName('Microsoft.SqlServer.SqlWmiManagement')| Out-Null
$smowmi = New-Object Microsoft.SqlServer.Management.Smo.Wmi.ManagedComputer PICARD
$sqlsvc = $smowmi.Services | Where-Object {$_.Name -like 'MSSQL*'}

#Change the startup parameters
$sqlsvc.StartupParameters = $params -join ';'
$sqlsvc.Alter()

Just as if we had changed this in our management console, the changes will not take effect until we restart the service. In addition to restarting the service, we also need to relocate the master files to the new location, which can not be done while the instance is running. The next part of the script will go ahead and to these tasks for us:

#Stop SQL Service, move files, start SQL
$sqlsvc.Stop()
Invoke-Command -ComputerName PICARD -ScriptBlock{Move-Item 'C:\Program Files\Microsoft SQL Server\MSSQL12.MSSQLSERVER\MSSQL\DATA\master.mdf' 'C:\DBFiles\MSSQLSERVER\master.mdf'}
Invoke-Command -ComputerName PICARD -ScriptBlock{Move-Item 'C:\Program Files\Microsoft SQL Server\MSSQL12.MSSQLSERVER\MSSQL\DATA\mastlog.ldf' 'C:\DBFiles\MSSQLSERVER\mastlog.ldf'}
$sqlsvc.Start()

I want to call out that I use the Invoke-Command in here because I am running this script remotely, but the Move-Item cmdlets need to execute using local paths. Also note that while I changed the location of the SQL error logs, I do not have to move them. This is because a new error log is created every time SQL Server starts, so we just need to make sure the path name is correct.

Once this script is complete, we now have a SQL Service running with the master database in an entirely different location. This process can easily be added to a build script to further automate our SQL builds and help us adhere to best practices. Combining this with the SMO and its WMI classes help make the change easier and protect us (somewhat) from accidental damage. Hopefully this helps you in understanding and building better automation for your own environments.

Managing SQL Server Services with #Powershell

14711793077_7088d420cf_zManaging service accounts is one of those tedious jobs that tend to annoy me. Changing the passwords of these accounts regularly is a good security practice, but takes a lot of time and can be difficult to manage. In other words, a perfect task to automate with Powershell.

There are two ways to handle this task, both through the Windows Management Instrumentation(WMI). The first way uses the base WMI interface, which can be used to manage all Windows services. Using it is a little convoluted, but gets the job done:

$svc = Get-WmiObject -Class Win32_Service -ComputerName PICARD -Filter 'Name = "MSSQLSERVER"'
$svc.Change($Null,$Null,$Null,$Null,$Null,$Null,'sdf\sqlsvc2','P@$$w0rd',$Null,$Null,$Null)

This call is easy to decipher. Using the .Change() method of the service class, we can update the service account name and/or password (as well as other properties of the service). You probably noticed the number of arguments the .Change() method takes, which makes it cumbersome to use. The other gotcha is that the service still needs to be restarted in order for these changes to take affect. Depending on your need, these gotchas can be good or bad, but can be handled depending on how you code around it.

If you’ve managed services through the GUI, using this method probably makes you think of how you manage accounts through the services MMC console. However, most SQL Server folks will use the SQL Server Configuration console instead. These two methods are subtly different, where using the SQL Server Configuration console will handle some additional tasks (such as restarting the service) as part of its interface. If we want to manage our SQL Services in the same fashion, we can leverage a part of the SMO, the Wmi.ManagedComputer Wmi.Service classes.

To handle our services, we need an extra step or two, but it’s a little cleaner to write:

[System.Reflection.Assembly]::LoadWithPartialName('Microsoft.SqlServer.SqlWmiManagement')| Out-Null
$smowmi = New-Object Microsoft.SqlServer.Management.Smo.Wmi.ManagedComputer PICARD
$wmisvc = $smowmi.Services | Where-Object {$_.Name -eq $ServiceName}
$wmisvc.SetServiceAccount('sdf\sqlsvc2','P@$$w0rd')

We first need to load the SqlWmiManagement assembly, just like loading the SMO libraries if we were using that functionality(note: this library is loaded if you load the SQLPS module). Then we need to instantiate the Managed computer object and retrieve the specific service we want to alter. The final step is to just change the service account.

This works about the same as the base WMI approach, though we’re altering the service by using the same functionality as the SQL Server Configuration Manager. This means that once we change the service account, it will force a service restart. This is good and bad. The good is that it will apply the change immediately and you will know right away if the account change is valid. The bad is that you can not delay the service restart, so if you use this method you want to be sure it is a good time to restart your SQL Service.

I have built a function around using the second method that makes handling this process a little easier. Also, because I’m not a fan of passing passwords in plain text, I built the function to take a PSCredential object to keep my account information secure. In order to spare you the wall of text, you can view the full function on my GitHub repository.

The function can be loaded through a variety of methods, but once it is loaded calling it is simply a matter of creating the credential for the service account and calling the function:

$cred = Get-Credential 'Enter Service Account'
Set-SqlServiceAccount -Instance PICARD -ServiceAccount $cred -Service SqlServer

Creating functions allows us to abstract some of the messy bits and make our lives a little easier. In this case, my function handles the following:

  • Decoding the credential in a way to keep the account information secure.
  • Managing the service names based on the instance name (passed in the standard HOST\INSTANCE name format).
  • Restarting the SQL Server Agent service if it is not running after up restart the SQL Server service.
  • Accept a list of instances and process all of them.

This simplifies the changing of account information and gives us many opportunities for automating large scale password changes. For example, if you use a single service account for all your instances, changing it is a snap:

$servers = @('PICARD','RIKER','KIRK','SPOCK')

$cred = Get-Credential 'Enter Service Account'
Set-SqlServiceAccount -Instance $servers -ServiceAccount $cred -Service SqlServer

This simple pattern and function will not only make managing our security policy easier, but also more consistent. Using a simple list of servers from a text file, a database table, or even our Central Management Server and combining it with this function means we ensure that we are applying these changes to every server in the list. This is how we can build for automation, focusing on making simple tasks like this repeatable and consistent.

Quick hat tips out to the following folks: