So here we are. After installing Server Core and configuring it, we’re ready to install SQL 2012. Fortunately, this is the easy part. We only have two steps and both are things that have been common actions for many years now.
The first step is to install the .Net 4.0 libraries. SQL Server requires these and they’re currently not part of the Windows configuration/setup. We’ll need to head out to MSDN and download the standalone .Net 4.0 installer for Server Core. You’ll need to do this on a separate machine since you won’t have access to a web browser on your core machine itself, but it’s not a large file(~50 MB). Once you have it, copy it over to your core machine and run the executable. The install should take 5-10 minutes and then you’re ready for SQL Server.
Step two is something I’ve done a lot of and strive to make a habit in most of my SQL Server environments: an unattended install. For those of you unfamiliar, this is simply the practice of installing SQL Server from the command line using a configuration file. This is actually how SQL Server is typically installed, you’re just building your configuration file as you click through the GUI. Read up on it on MSDN.
For my install, I’m just going to use the sample configuration.ini file found on MSDN, with only a couple adjustments for my environment and a couple additional flags. I won’t go through the whole file, but here are a couple key options that are used:
- QUIET=TRUE – You *must* have this set, as any other option requires GUI elements of the install and your install action will fail. Like I said earlier, Server Core hears ya’, Server Core don’t care. We’re flying without visuals here, folks.
- IAcceptSQLServerLicenseTerms=TRUE – Typical license agreement acceptance, but since we don’t have a GUI with a checkbox, we need to indicate our acceptance in our configuration file.
- TCPENABLED=1 – By default, SQL Server won’t enable TCP communication. So instead of going into the configuration tools after the fact, we’re going to enable it in our setup with this flag.
- SECURITYMODE=SQL – I rarely see servers that are Windows authentication only, but SQL Server uses that mode by default. We need to use this option in order to set mixed mode authentication. This also means we MUST use the SAPWD option to declare our SA password.
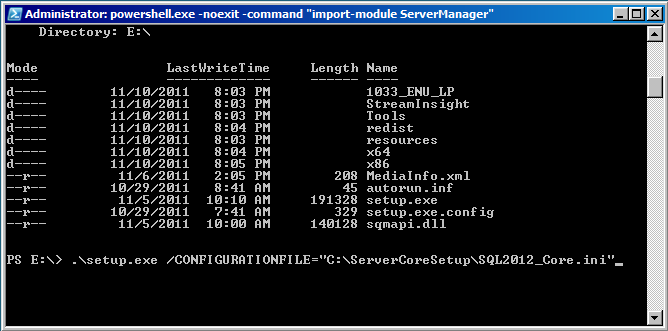
Once we have this, it’s a simple matter of running setup.exe and declaring the configuration file. With my VM, I’ve mounted the SQL 2012 RC0 image to my E:. From here, it’s one line and off we go. 
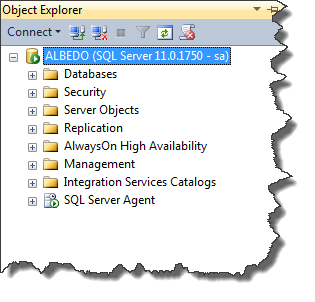
Now we just wait for SQL to install, which should take 5-10 minutes depending on your system. Once it’s complete, then we can fire up SQL Server Management Studio and connect to our brand new instance.
After this, it’s just SQL Server folks. Everything we’re used to doing, whether it’s using T-SQL or the Object Explorer, we’ve done before. It’s just now we’re doing it on a box that has a smaller OS footprint, leaving us with a happier place for our SQL Instance to live.
With our install complete, I want to leave you with a couple extra tips. Keep in mind that while the server itself has no GUI, we can still use MMC snap-ins to connect to the server remotely and manage it. This way, if you need to change firewall rules, add users, or any other management task, you can still use the tools your familiar with. Also, by forcing remote administration, you’re adding an additional level of security to your systems.
While AlwaysOn and many of the business intelligence features are being highly touted, I’m pretty excited about this bit of functionality in SQL 2012’s feature set. There’s a lot of power here for automation, security, and performance (all things I love), so I’m going to be pushing this where ever I can. Hopefully you can benefit from it as well.


 I’m tweeting!
[…] Core Mechanics, Part Three – Continuing his excellent tutorial series, it’s Mike Fal (Blog|Twitter) […]